Setting up Studio in Salesforce allows users to manage customers, appointments and configuration from within Salesforce. For Studio to work inside Salesforce we require the creation of a connected/canvas app and the setup of a SAML connection.
Before getting started
Before setting up Studio in Salesforce, log in to JRNI at parent level and open the SAML settings page (https://{{company}}.bookingbug.com/conf/saml/new). You'll need the info from here to put in to Salesforce.
Step 1: Set up a new connected app
Log in to Salesforce as a system admin (Sandbox or Production).
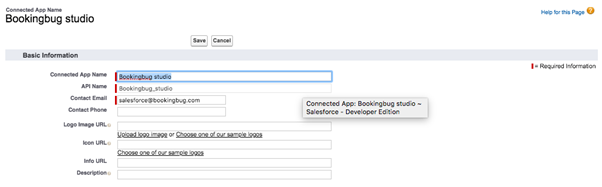
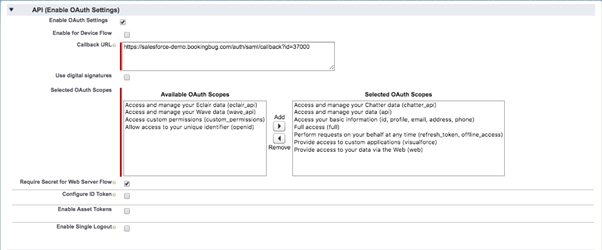
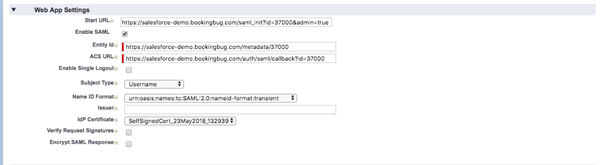
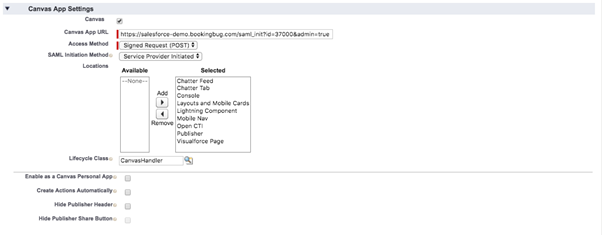
Go to Setup (cog in top right corner) > Platform Tools > Apps > App Manager. Click New Connected App. Populate the fields with the parameters in the Settings sheet.
Once saved, go back to Apps > Connected Apps > Manage Connected Apps, and click on JRNI_studio. Here you can view all app details and fine the relevant SAML login information. If the SAML login information is not displayed and following error is shown: "Enable Identity Provider". The Identify Provider is not setup correctly and will need to be enabled in Salesforce.
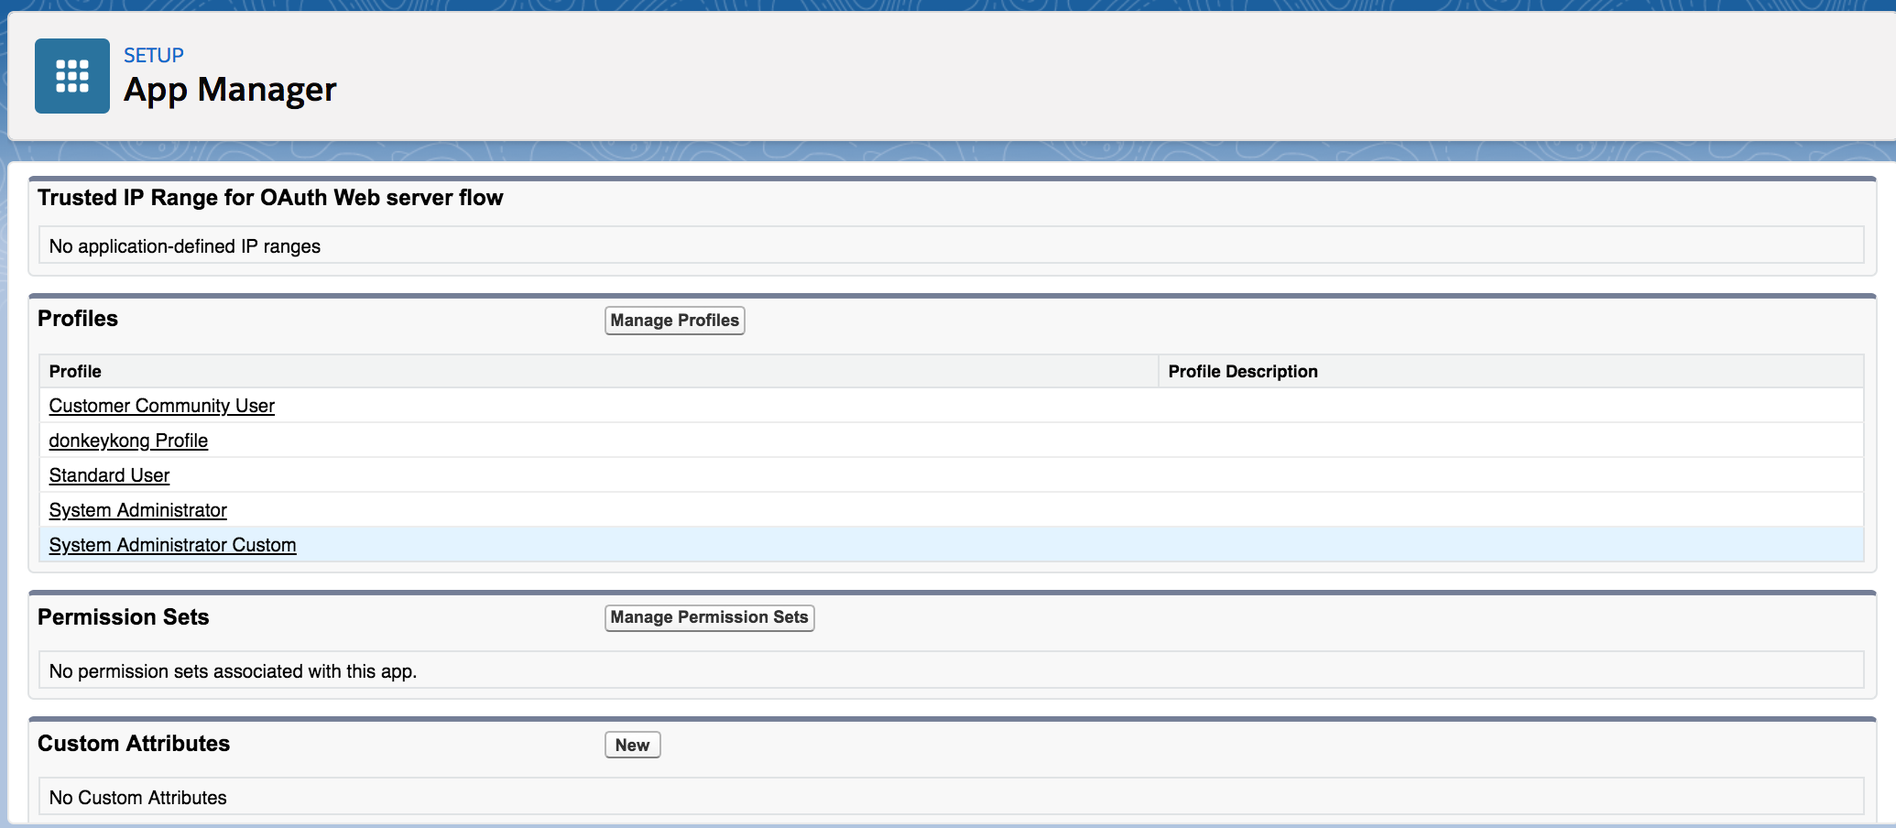
In the JRNI_studio app, when scrolling down there is the option to add Profiles. This is important to allow specific profiles in Salesforce to have access to the canvas app. This is necessary to be able to open our Studio interface in Salesforce. In the Profiles section, click on Manage Profiles. Add all the profiles that need access.
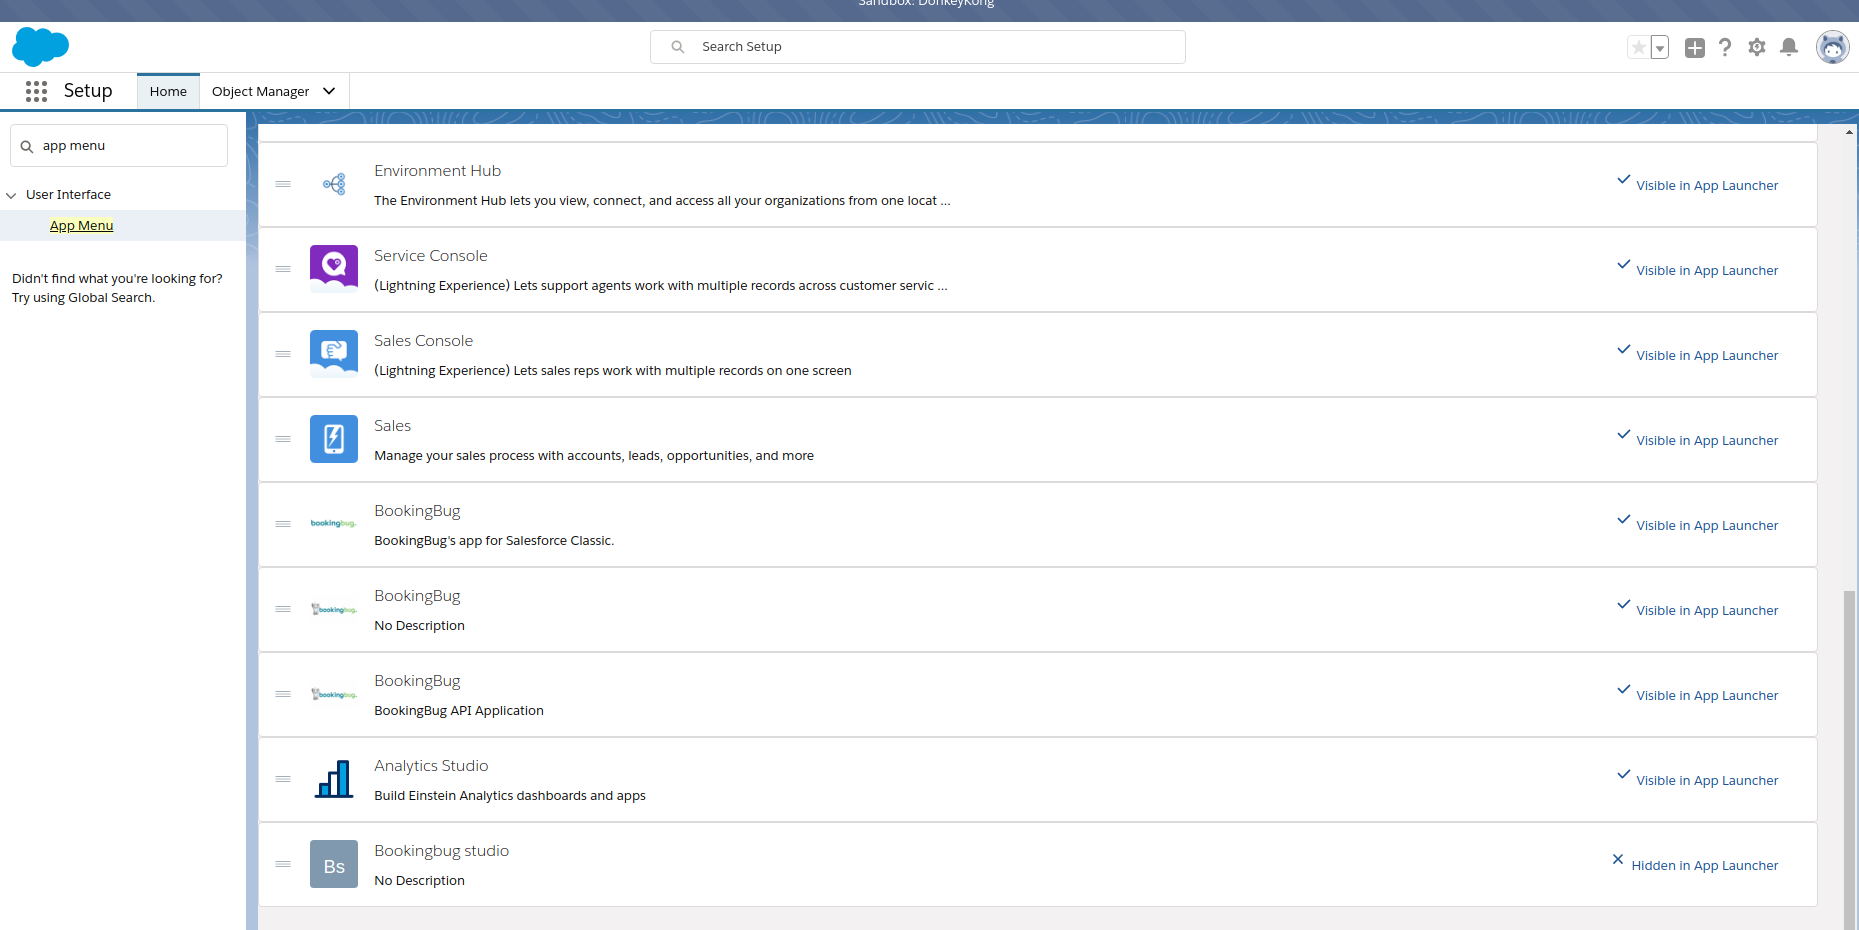
Hide the newly created app from the App Menu. In settings, look for the App Menu. Once opened, look for the app JRNI_studio and select Hidden in App Launcher. This app is not required to access the Studio page.
Step 2: Set up a SAML connection
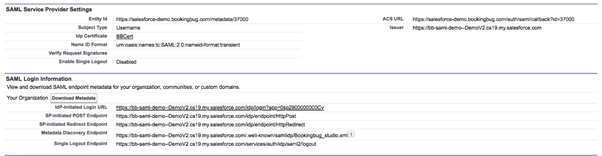
Now you need to set up the SAML connection in JRNI. To do so, you must first retrieve the SAML IdP SSO Target URL from Salesforce (Idp certificate). In Salesforce, go to Setup > Platform Tools > Apps > Connected Apps > Manage Connected Apps, and click on the JRNI_studio app. Open the SAML Service Provider Settings and click the download link for the Idp Certificate.In the SAML Login Information, take note of the SP-Initiated Redirect Endpoint. This is required in following steps for setting up the SAML connection in JRNI.
Now log in to JRNI at parent level and go to Settings > Advanced settings > SAML settings, and add new. Populate the fields with the parameters in the Settings sheet.
Congratulations! You’ve now set up a new app and a secure SAML connection between JRNI and Salesforce. You can now set up and manage your user permissions and profiles.