Table of Contents
Managing live queues via the Concierge page
 Updated
by JRNI
Updated
by JRNI
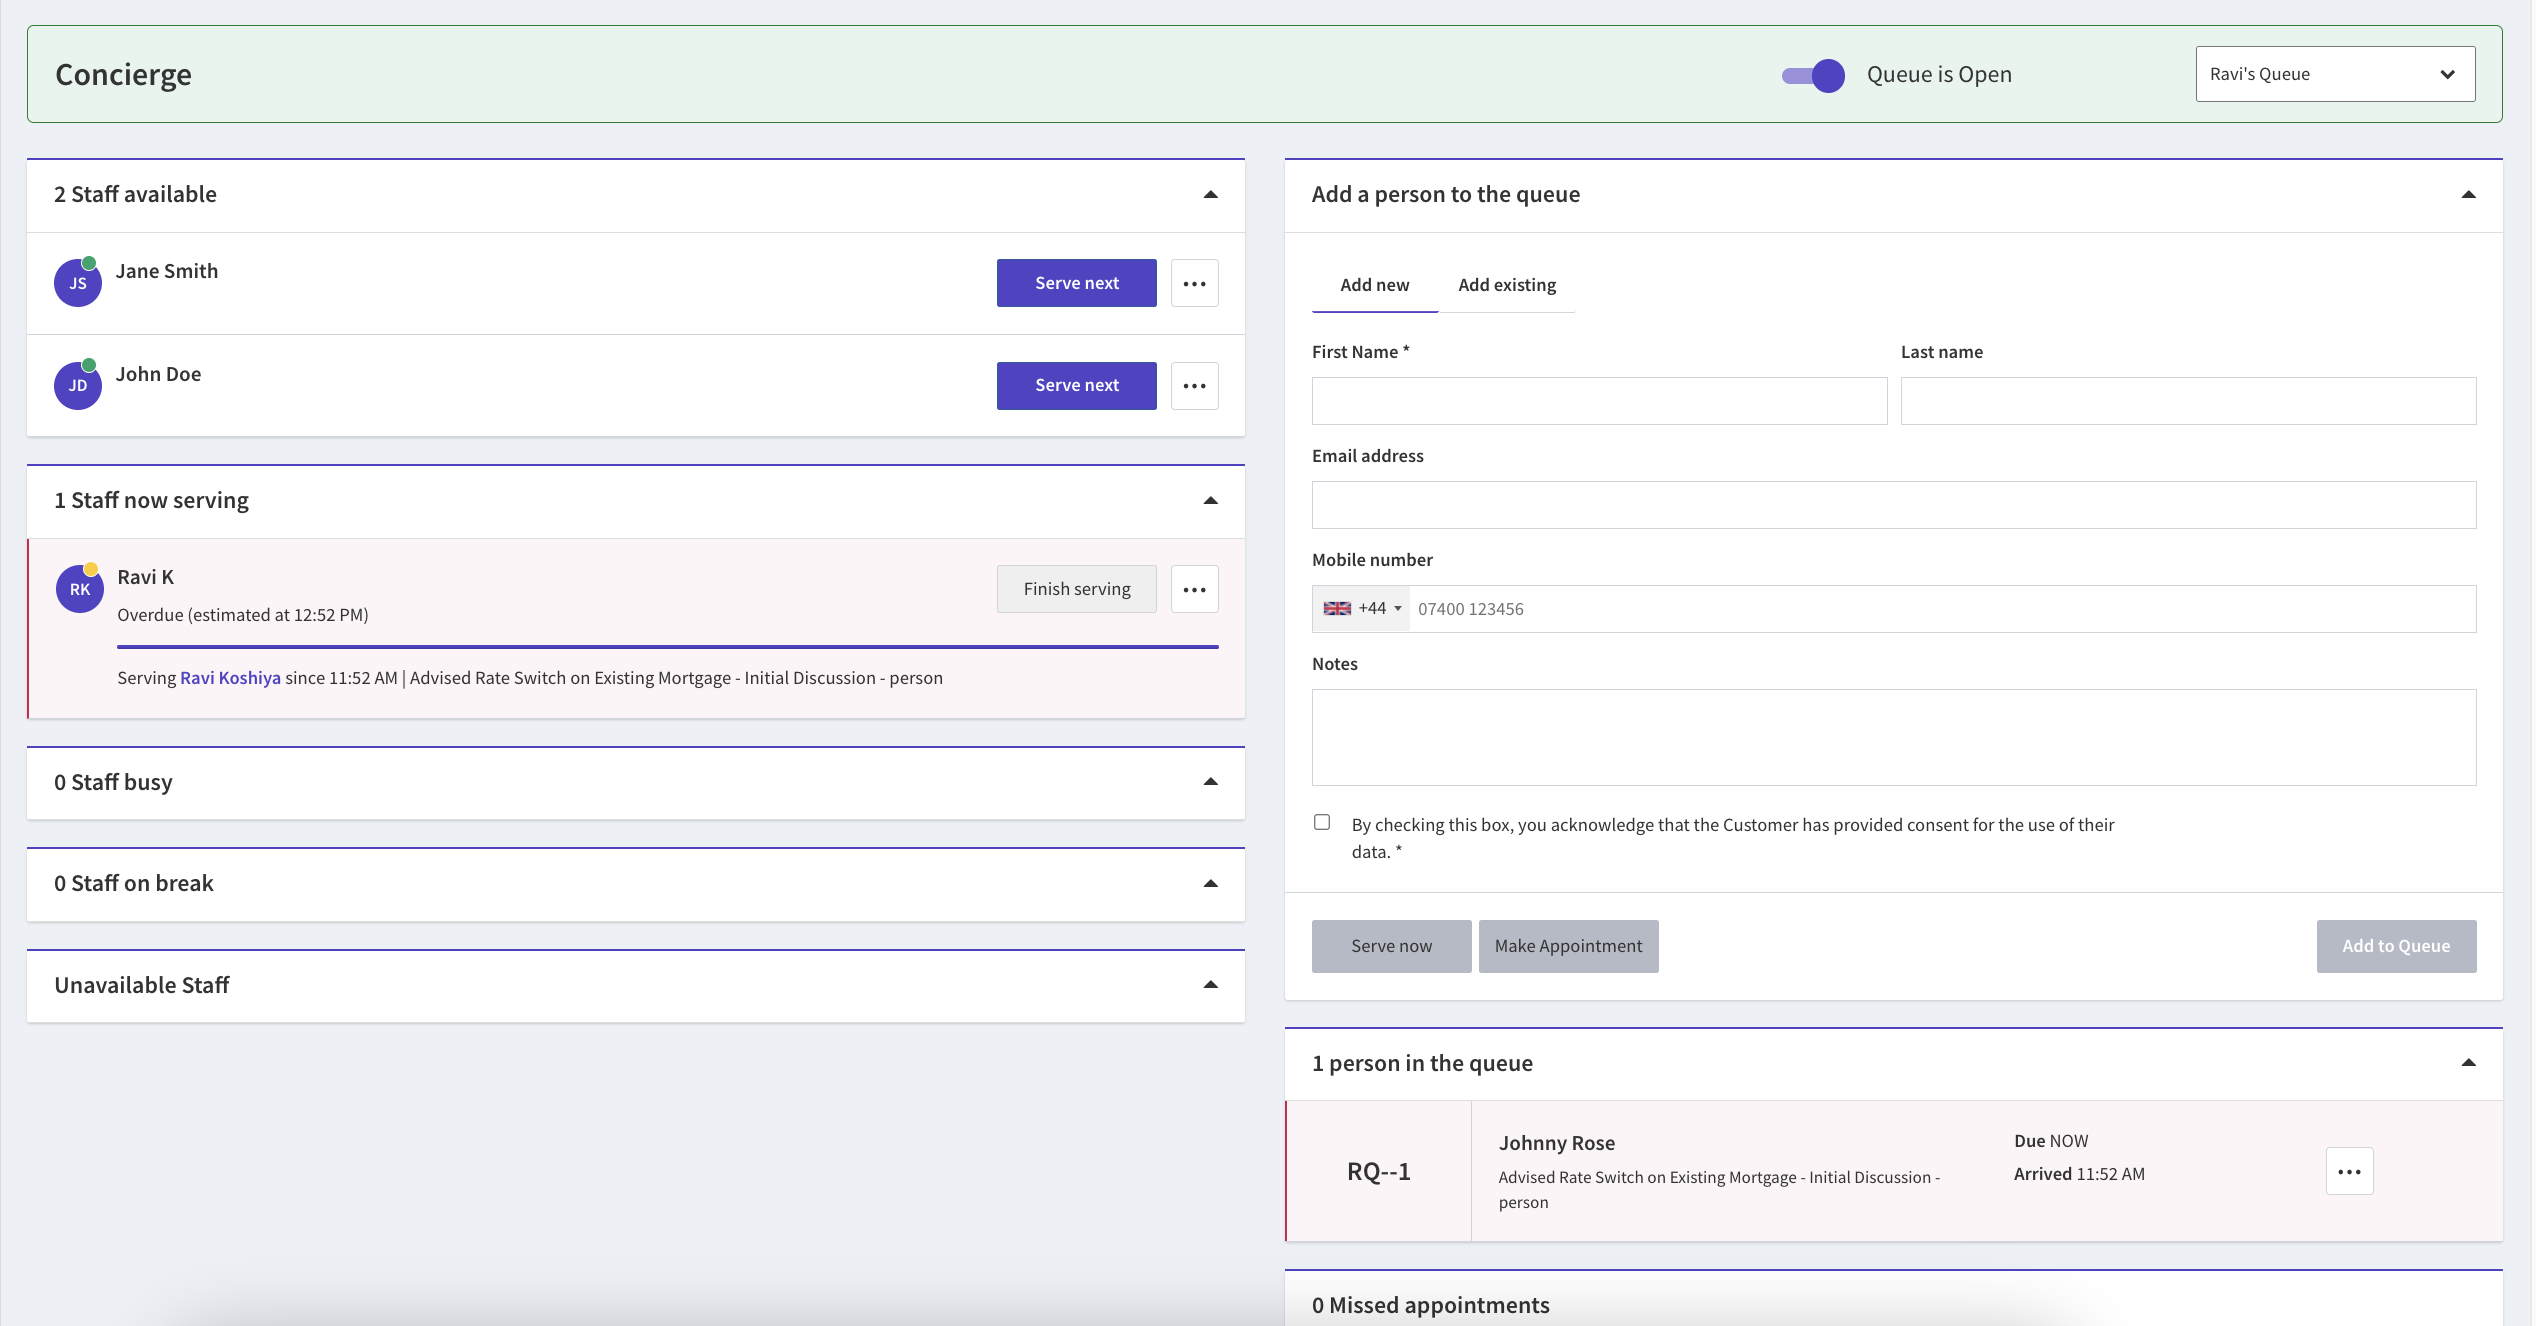
The Concierge page is the central hub of JRNI Virtual Queuing, where you can manage one or more live queues. Whether you are a staff greeter using the Concierge page to welcome walk-in customers to store and manage wait times, or a staff member looking to manage their own queue - this article walks through each step.
Selecting a queue
Choosing a queue to manage
If multiple queues have been set up, you can choose a specific queue you wish to manage. Navigate to Home > Concierge and then select your chosen queue from the dropdown (top right corner).
Opening/Closing a queue
The switch in the same panel allows you to easily open and close a queue which will block new customers from joining the queue. (To fully disable a queue and remove it from the concierge you can edit the queue itself My Business > Queues and check "disable". The same section also allows you to set up an automatic schedule of when the queue should be opened)
Individual staff queue / agenda view
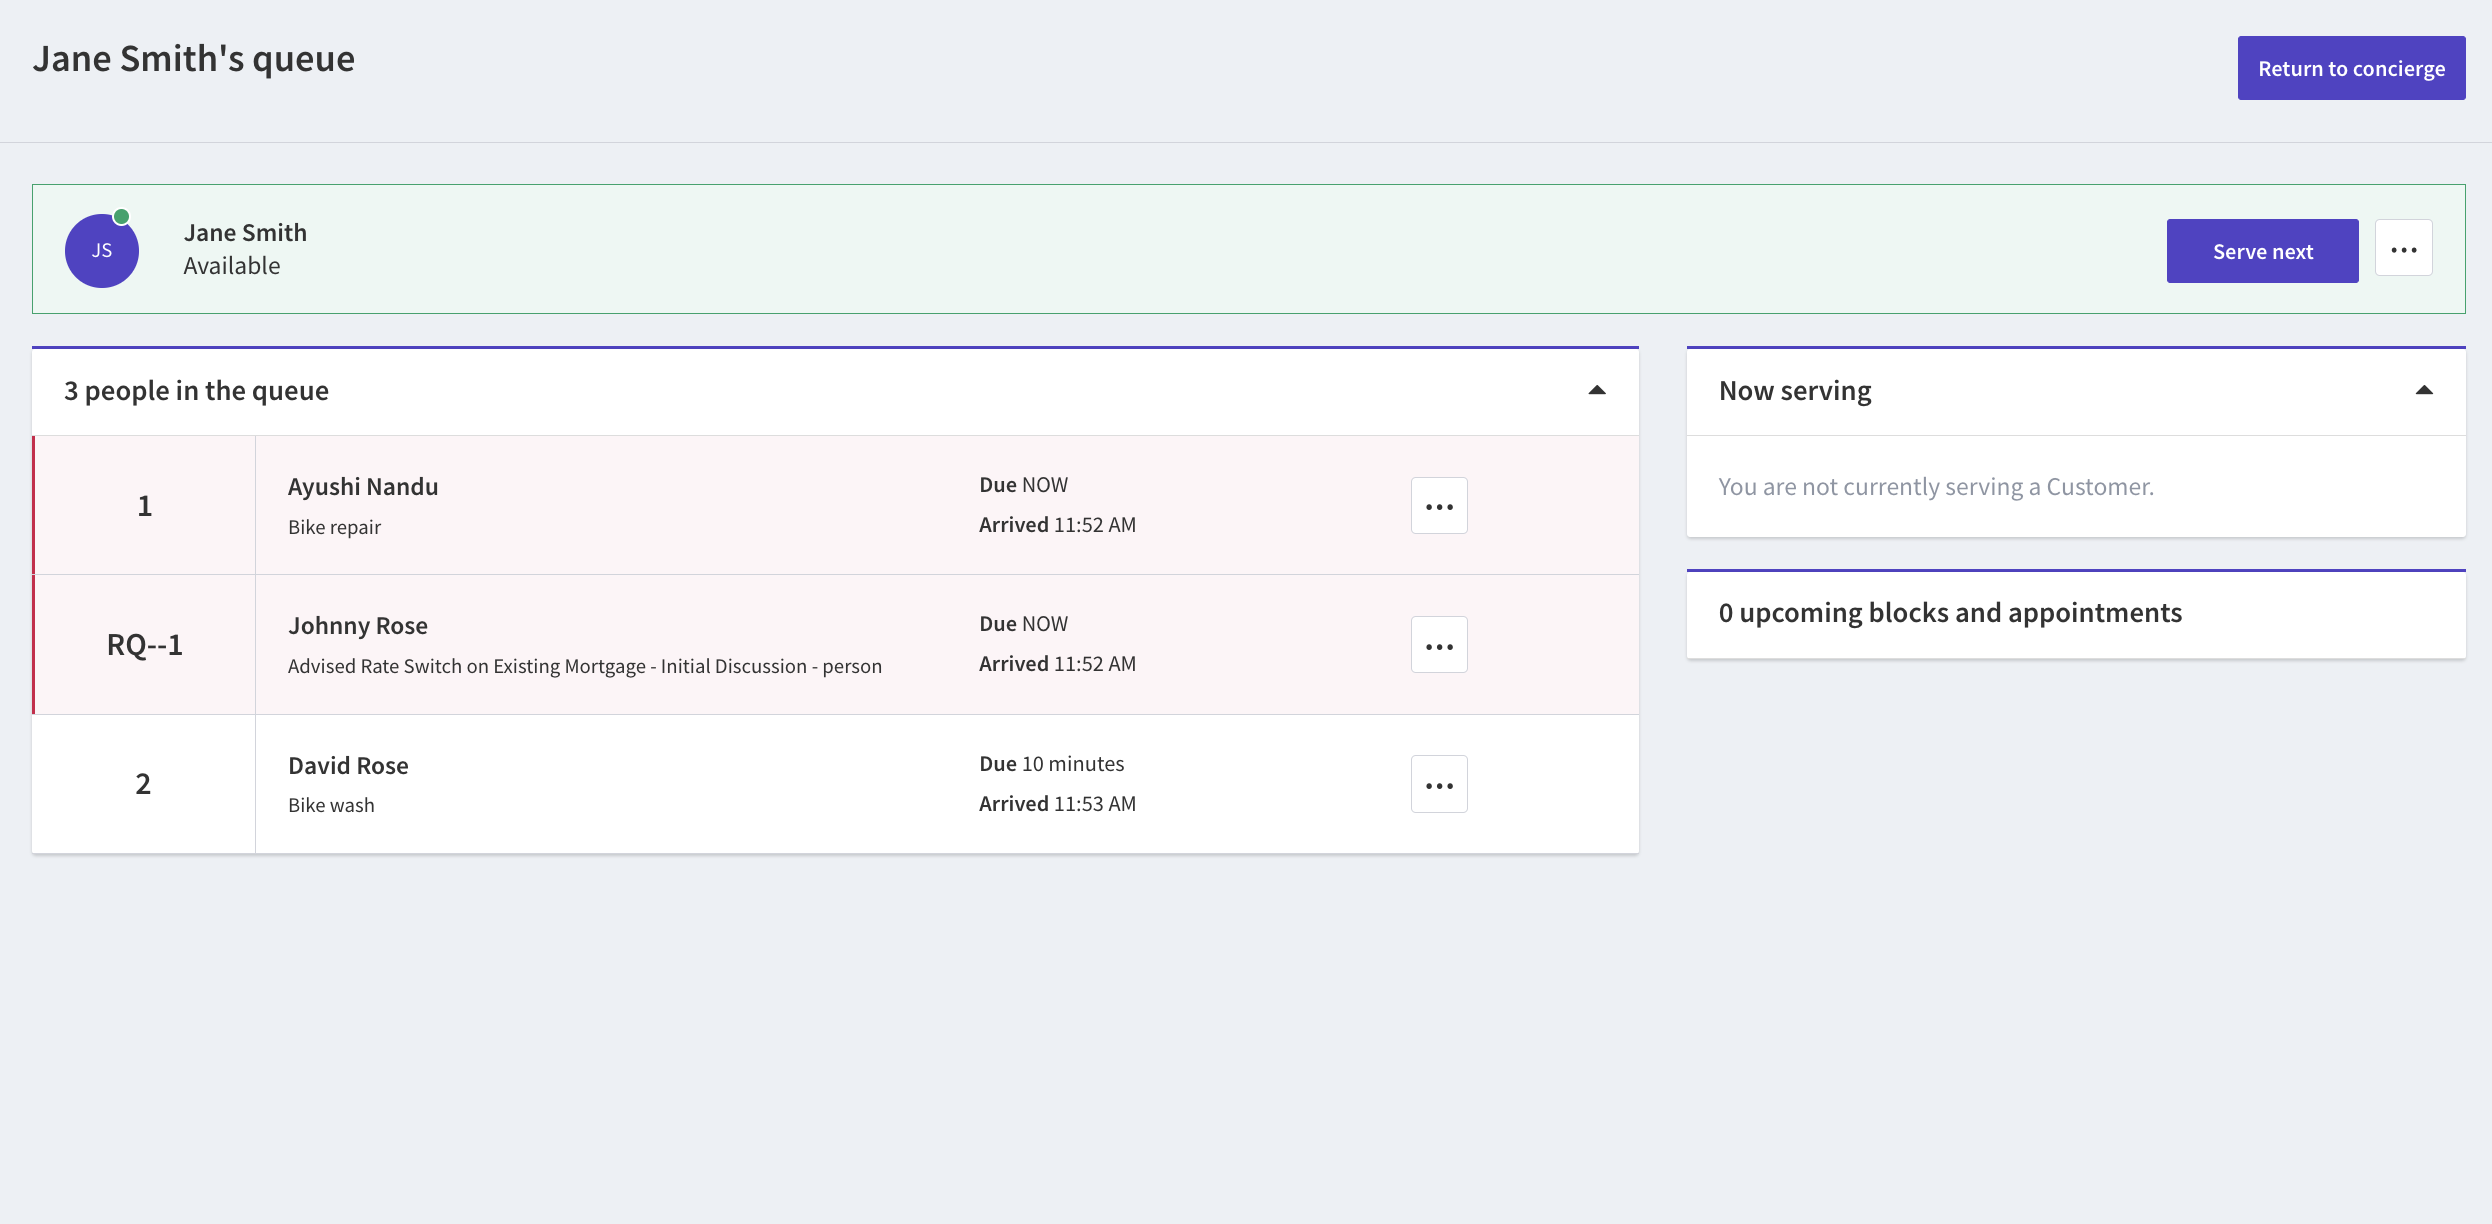
Typically, a staff greeter would be managing walk-ins and any queues via the Concierge page. However, there are cases where a single staff member might wish to manage their own queue for a service they are delivering.
There is an optimised agenda view of the concierge for a single specific staff to facilitate this. It can be reached by either selecting the staff member’s name/profile icon or clicking on the 3 dot menu next to a staff name and select "View Agenda". This will open up a view of the individual staff queue, without the distraction of queuers waiting for a different service / staff member.
Mark staff available for live queuing
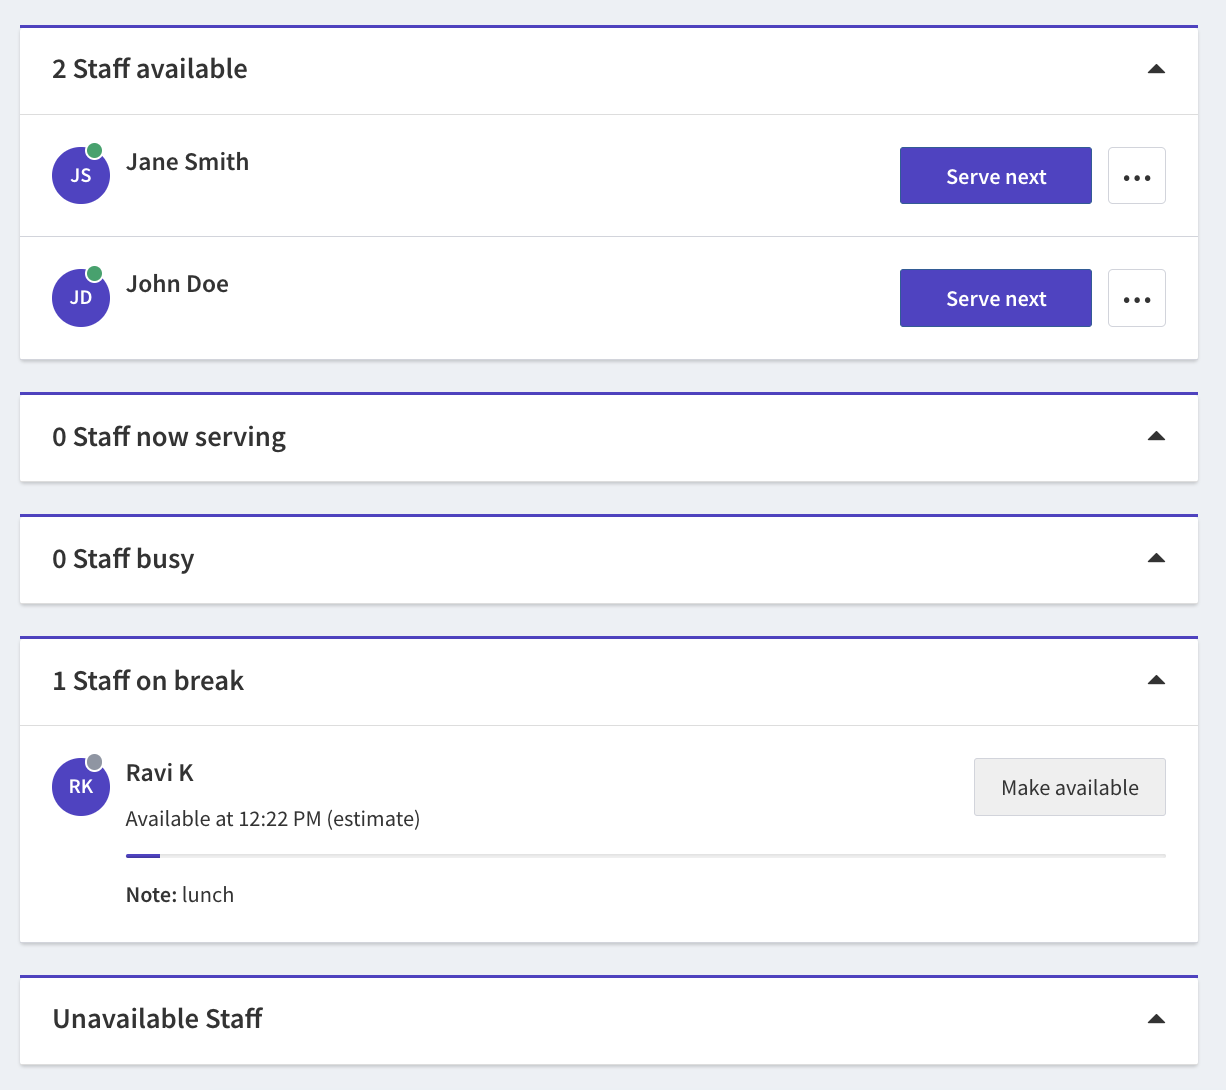
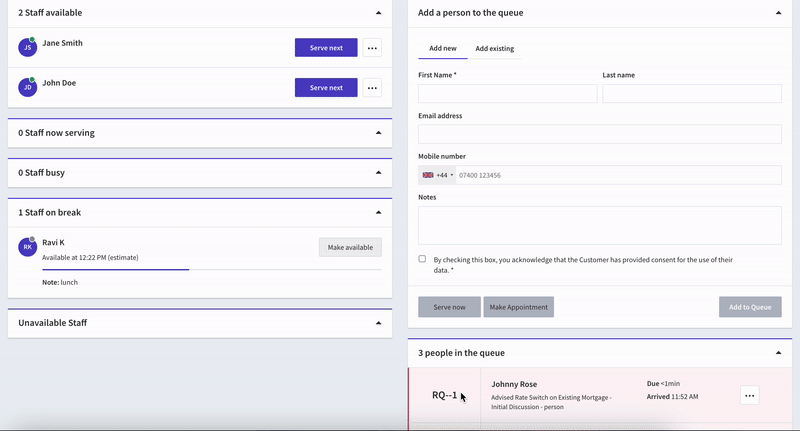
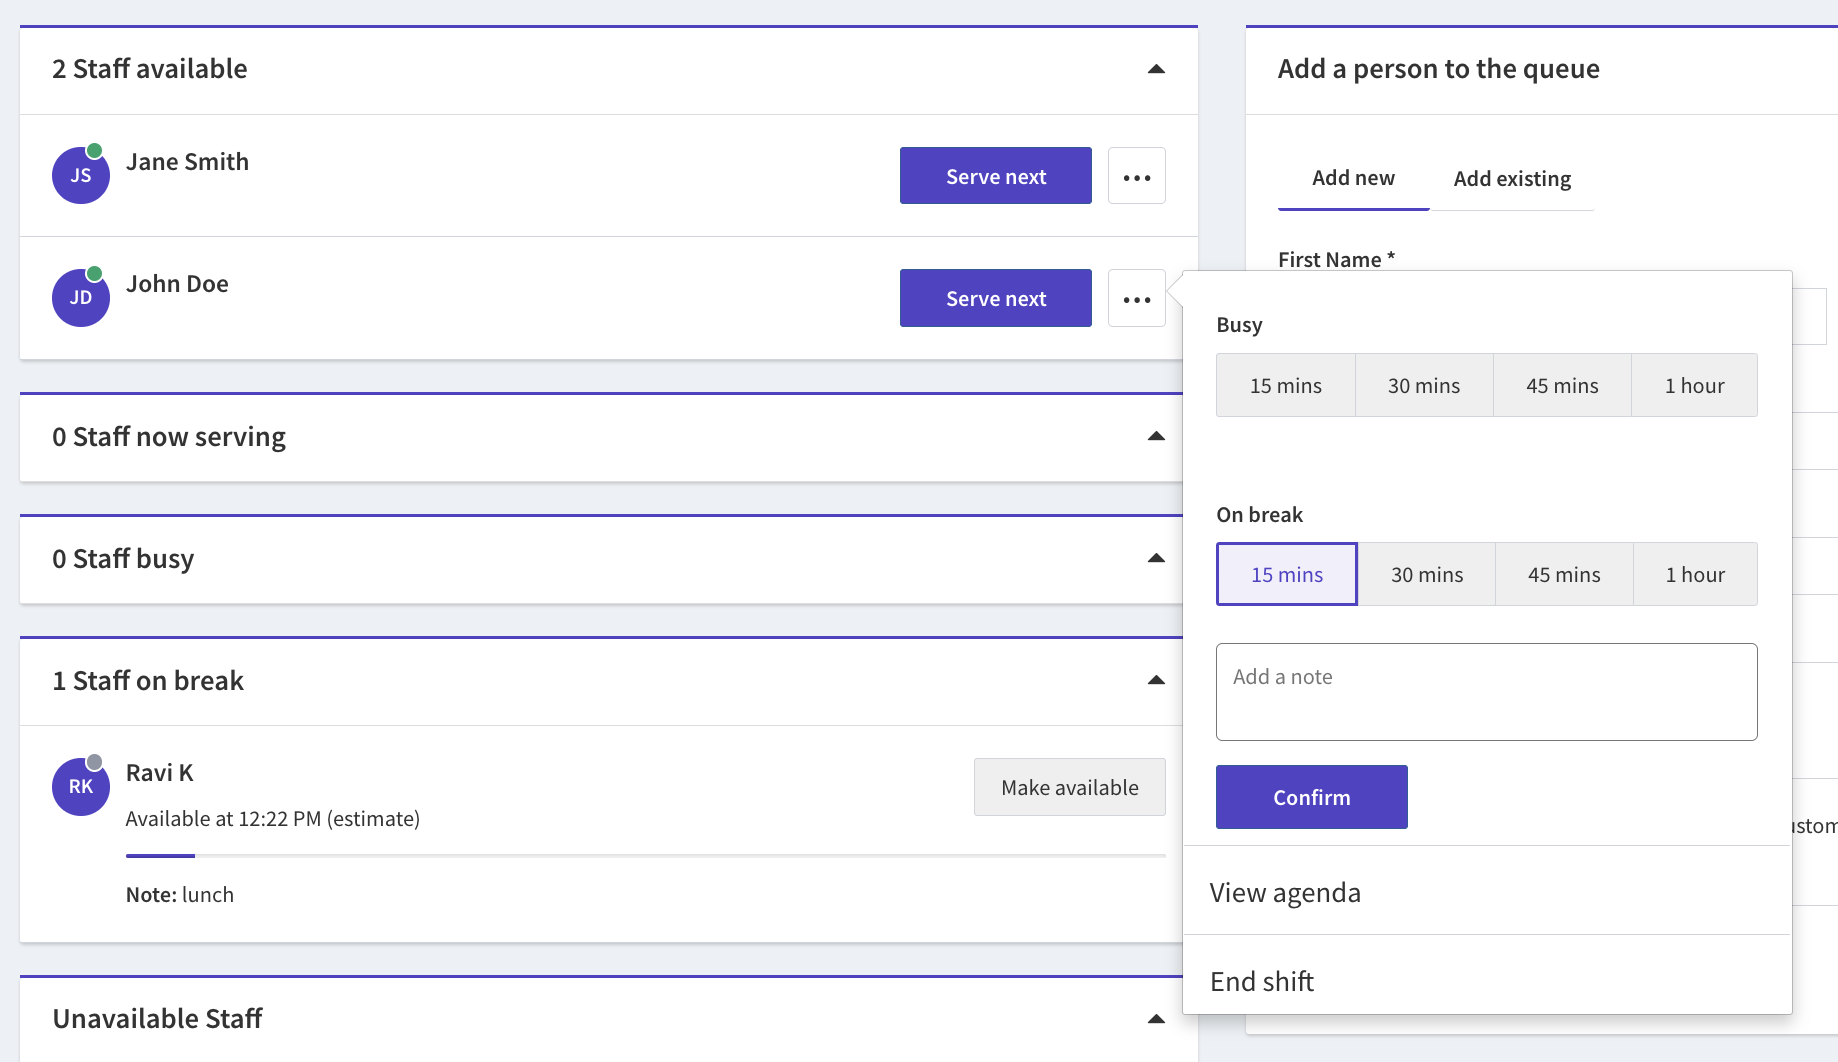
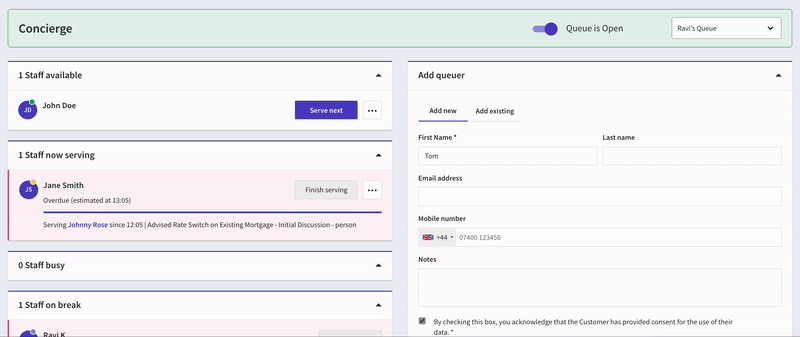
To mark staff as available in a live queue, and ready to serve queuers, select Make available in one of the following sections; Staff busy, Staff on break, Staff unavailable. They will then appear in the Staff Available section.
Serve a queuer
There are two ways to begin serving a queuer;
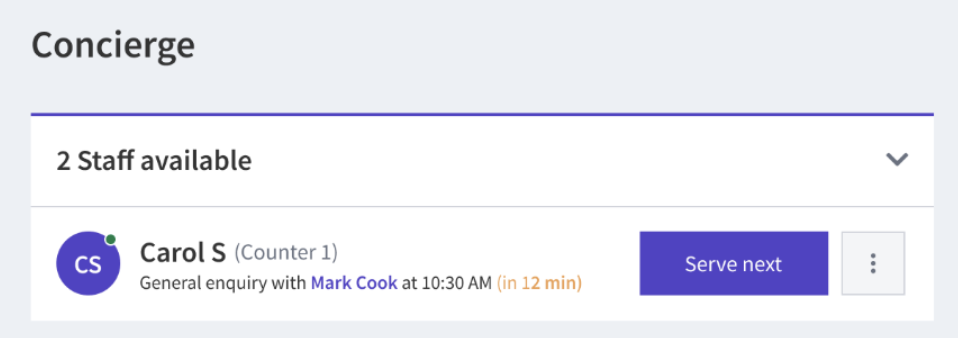
A) By Staff: Navigate to the Staff available section and select the Serve next button. This will serve the queuer at the top of the Queuers list.
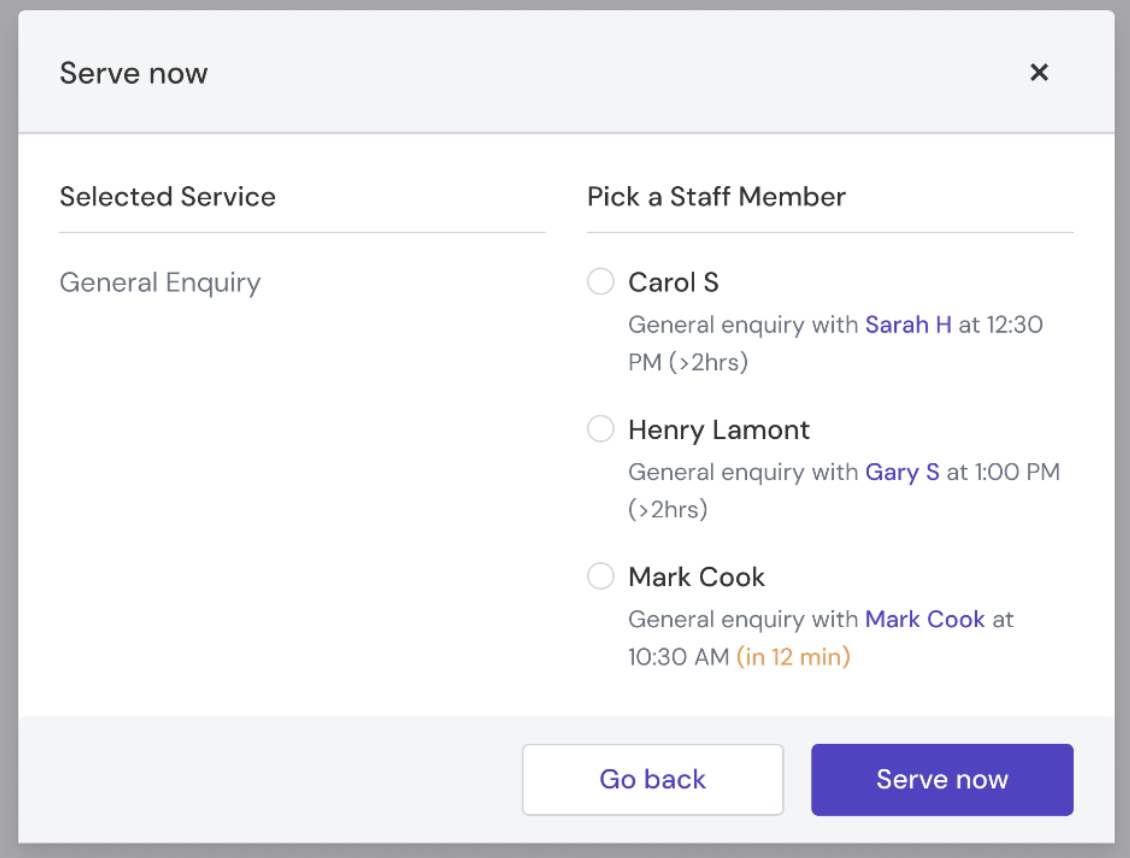
B) By Queuer: Navigate to the Queuers section, select the three-dot icon, followed by Serve now, and then choose a staff member (if multiple are available). Any queuer from the list can be selected and served, as required.
Transfer queuer to another queue
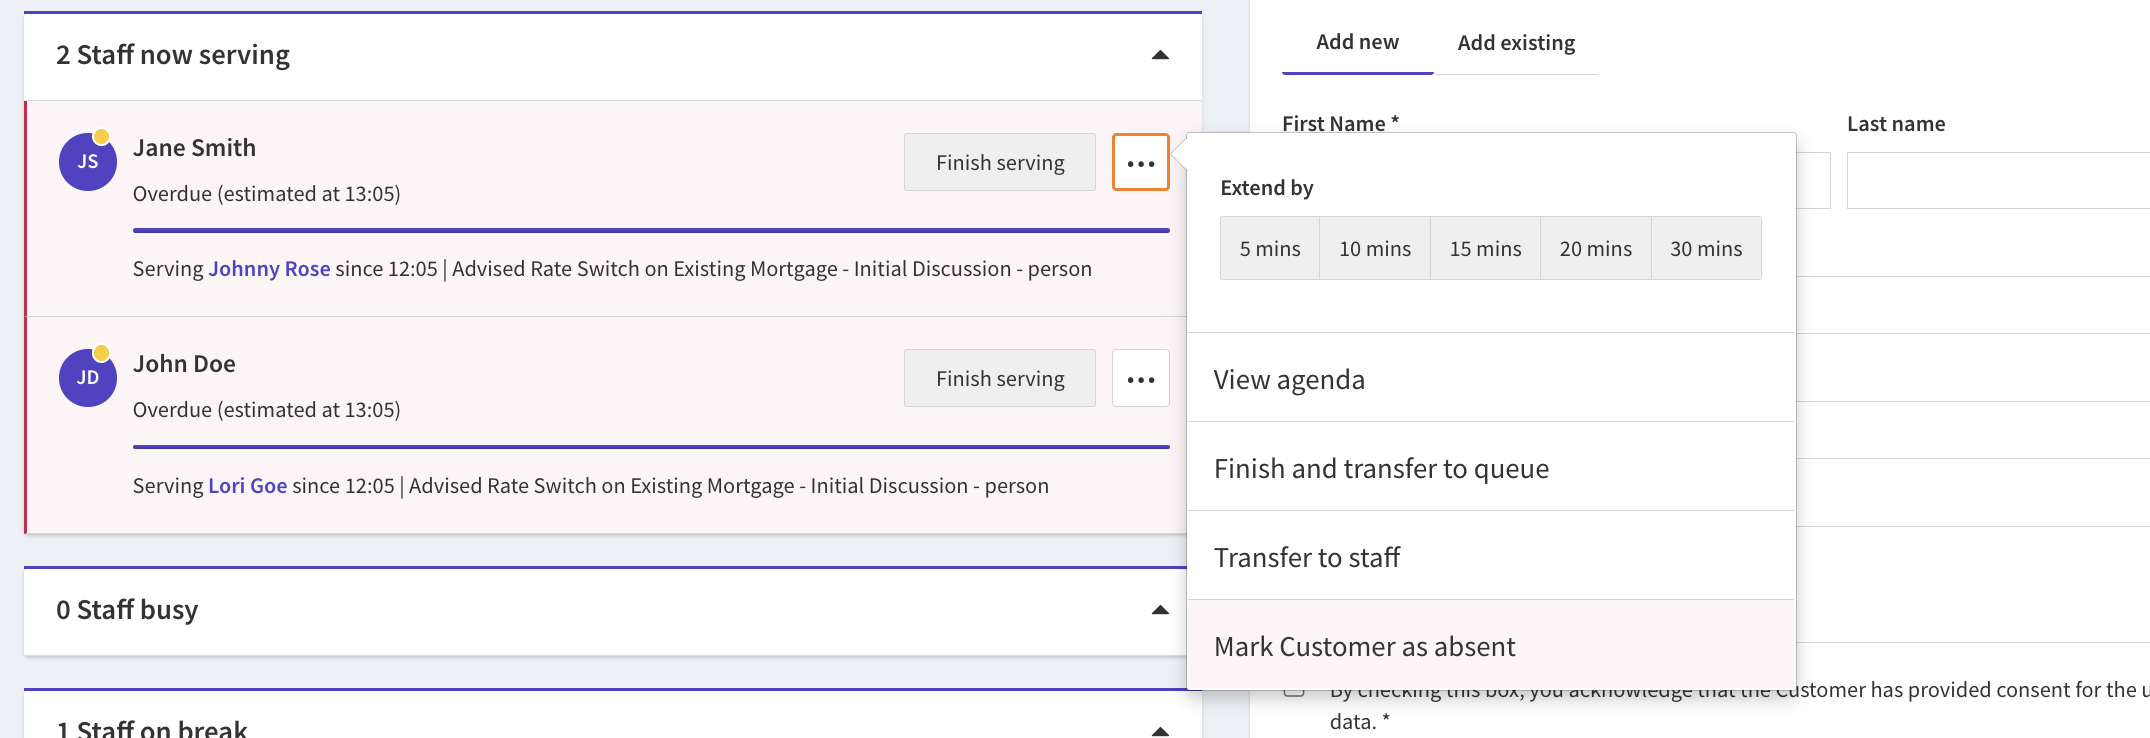
When a customer has joined the wrong queue or needs further/follow-up assistance for another topic in a different queue, you can now also transfer them to another queue. Click on the 3 dots next to ‘Finish serving’ and then click on ‘Finish and transfer to queue’.

This will open a modal window shown on the right. Select a new queue & service, and then click on next. Fill in the booking details. Add any notes if required and click on ‘Confirm’.
Finish serving queuer
When a staff member has finished serving a queuer, simply navigate to Staff now serving and select the Finish serving button, followed by any outcome (Outcomes, if pre-configured, allow a staff member to enter an outcome after the completion of an appointment). The staff member will move back to the Staff available section and the queuer/customer will be removed from the Concierge page.
Add new queuer
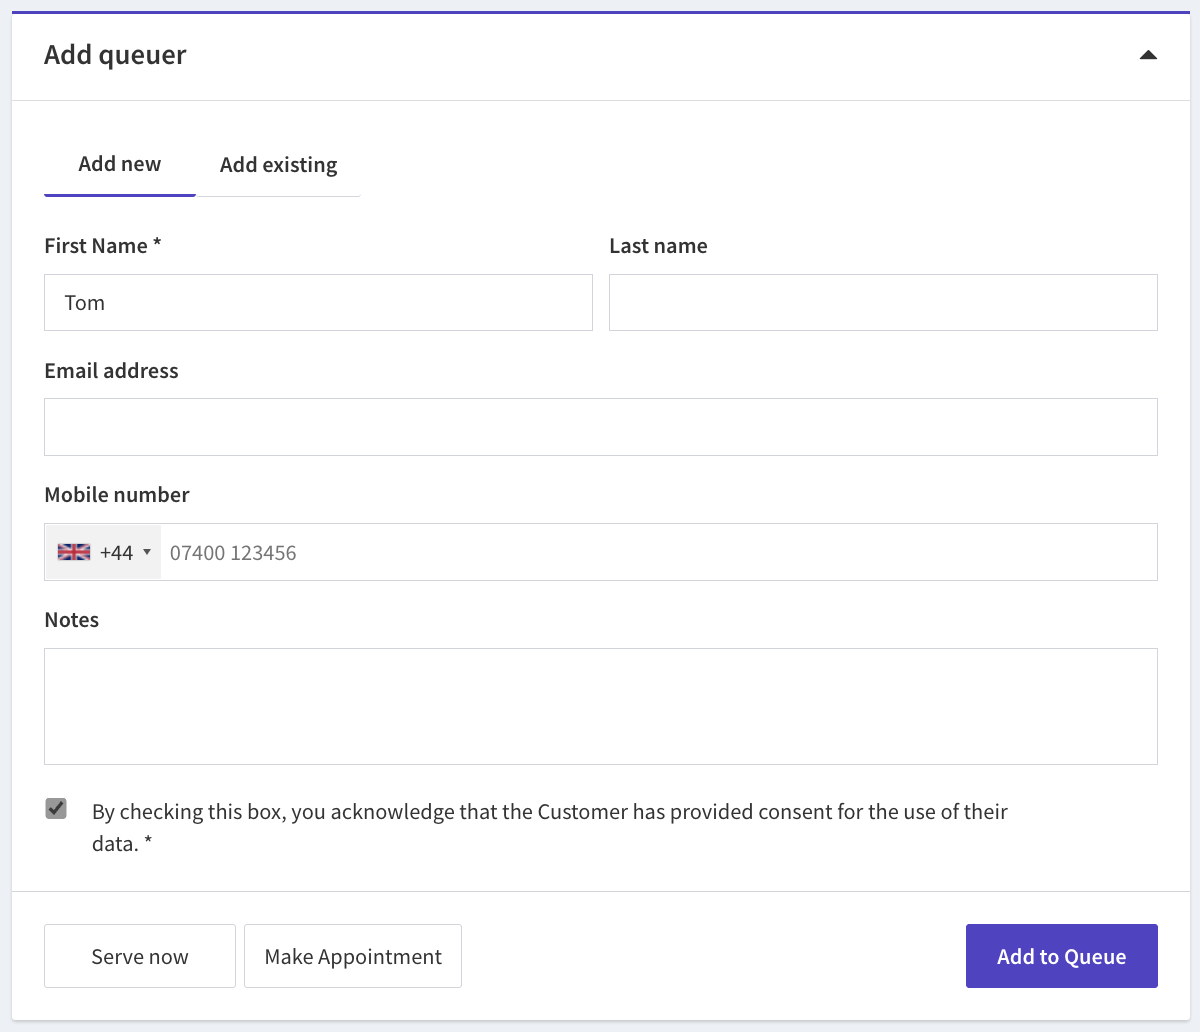
Queuers can join a queue themselves either from a queuing journey, a kiosk or the online customer booking journey. To add a new queuer or walk-in customer as a staff, navigate to the Add new queuer section and select one of the following:
A) Add new: Add a new customer by entering their name, mobile number, and any notes that will help give additional context, particularly for the serving staff member. Mobile number is used to send the customer any default SMS notifications that have been configured.
B) Add existing: Search for an existing customer by name or email.
Select the Serve now button to serve the customer immediately, Make Appointment to book a future appointment for the customer instead, or Add to queue to add them to the bottom of the Queuers list.
When adding a new queuer you’ll be asked to select from a service (if there are multiple). Any booking questions assigned to the service will also appear.
Create new appointment
Use the “Add queuer” steps above to create an appointment for the customer, instead of adding them to the live queue. Visit our guide on Creating appointments bookings for information on the booking process.
Remove queuer
There are two ways to remove a queuer from the queue (and consequently the Concierge page):
A) Leave queue: To remove a queuer from a queue navigate to the Queuer section, select the three-dot icon next to the queuer, followed by the Leave queue button.
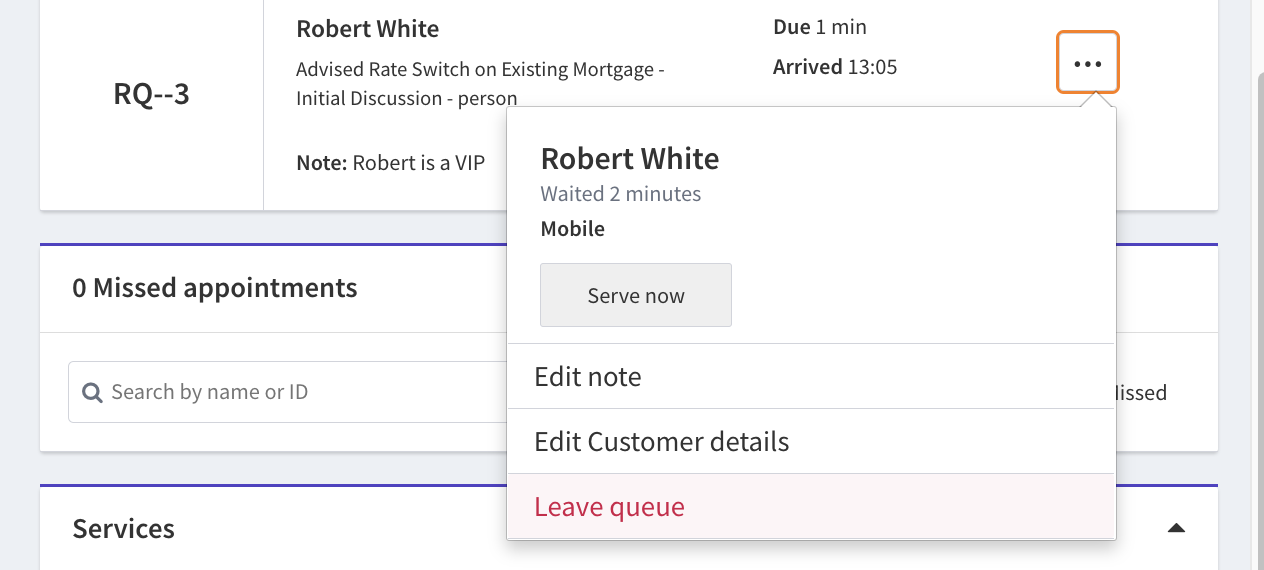
B) Mark customer absent: Alternatively, if the customer is not present on-site, you can remove them from the queue by marking them as absent. Navigate to the Now serving section, select the three-dot icon, followed by Mark customer absent.
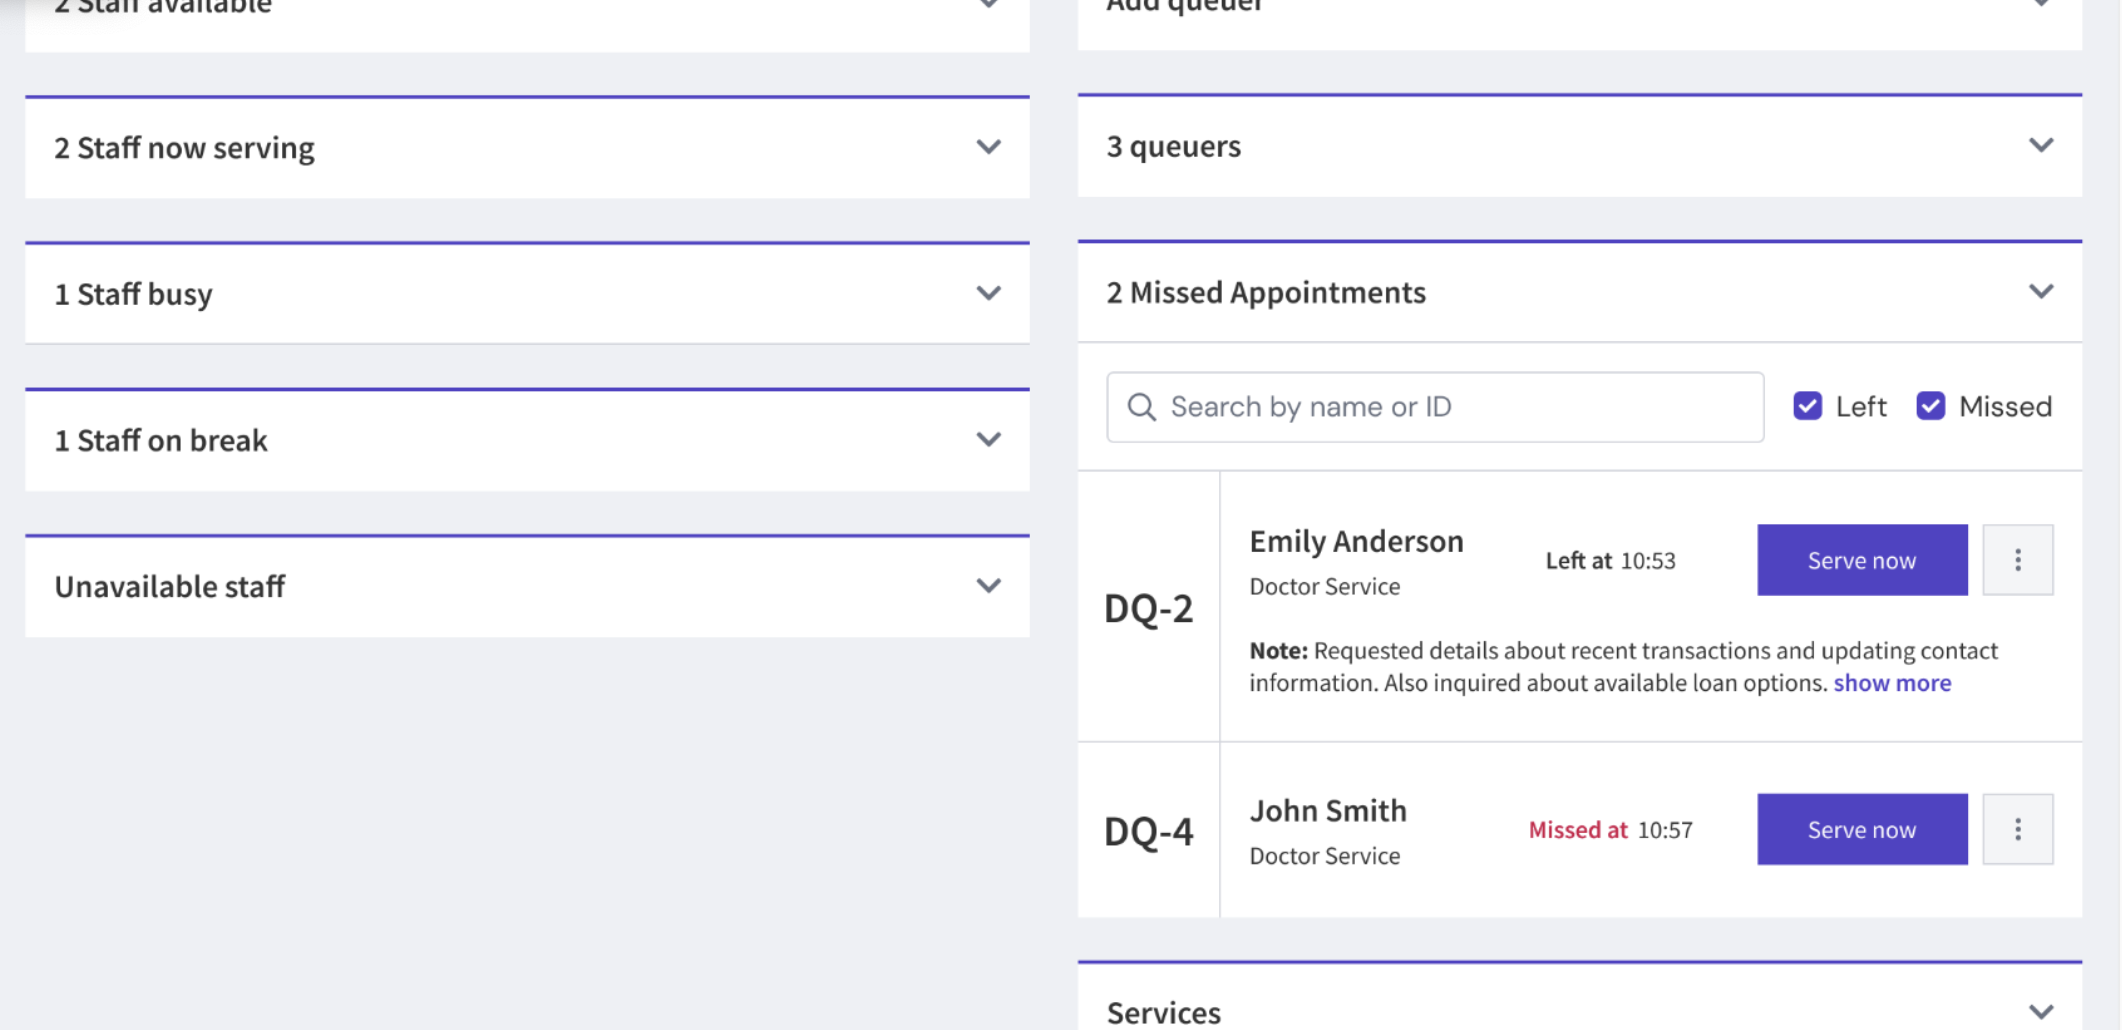
Missed appointments
A new section has been added to the concierge for missed appointments. All customers marked as absent or who left the queue will be listed here. Users can either serve them immediately by clicking on ‘Serve now’, or re-add them to the queue by clicking on the 3 dots. Additionally, users can search for customers by name or ID.
Mark staff busy / on break
Should the staff member need to take a break, or become unavailable for serving the queue, they can mark themselves (or be marked) as Busy or On break. Navigate to the Staff available section, select the three-dot icon, followed by one of the selected time periods for Busy or On break.
Once selected, the staff member will move to the respective section. They will need to be made available manually by selecting the Make available button.
For enhanced visibility, a red highlight will appear when a staff's set busy/on break time is overdue, as shown below.
Extend serving time
For any staff that are serving customers, the serving time can be extended if more time is needed. Simply select the three-dot icon next to the serving staff member, followed by the additional amount of time required.
Related articles
- Overview of the Concierge page
- Setting up a virtual queue
- How customers can join a live queue
- Setting up and managing a display board
Still have questions?
If you have any further questions about managing queues via Concierge, please contact JRNI Customer Support, who will be happy to help.