Appointment automation
 Updated
by Lorena
Updated
by Lorena
In this guide, we introduce you to our new appointment automation feature and explain what it is and how your staff can use it to automate event management and appointment scheduling.
Appointment automation
How to access
The landing page builder can be accessed by navigating to Studio → Your Business → Appointment automation
Appointment automation (Under "Your business") | Automation Settings (Under "Settings") | ||
Parent | Owner | Full access | Yes |
Admin | Full access | No | |
User | Can launch & manage campaigns Can manage engagement alerts. Cannot create, edit, or delete templates | No | |
Child | Owner | Full access Cannot edit templates inherited from a parent | No |
Admin | Full access Cannot edit templates inherited from a parent | No | |
User | Can launch & manage campaigns Can manage engagement alerts Cannot create, edit or, delete templates | No |
General
JRNI’s AI-Powered Automation fully automates customer communication, timing and location negotiation, customer-to-agent matching, and calendar booking and re-booking, through e-mail, SMS, chat, and other communication channels. Staff spend less time scheduling engagements and more time creating experiences with customers.
Our smart Ai identifies and launches engagement campaigns in real time at the moment when your audience is most likely to engage. Brands offering one-to-many events can send relevant and personalized communications before, during, and after an event and promote the booking of related appointments whilst intelligently matching staff and customers based on configurable preferences.
Creating a template
The first step in launching a campaign is to create a template
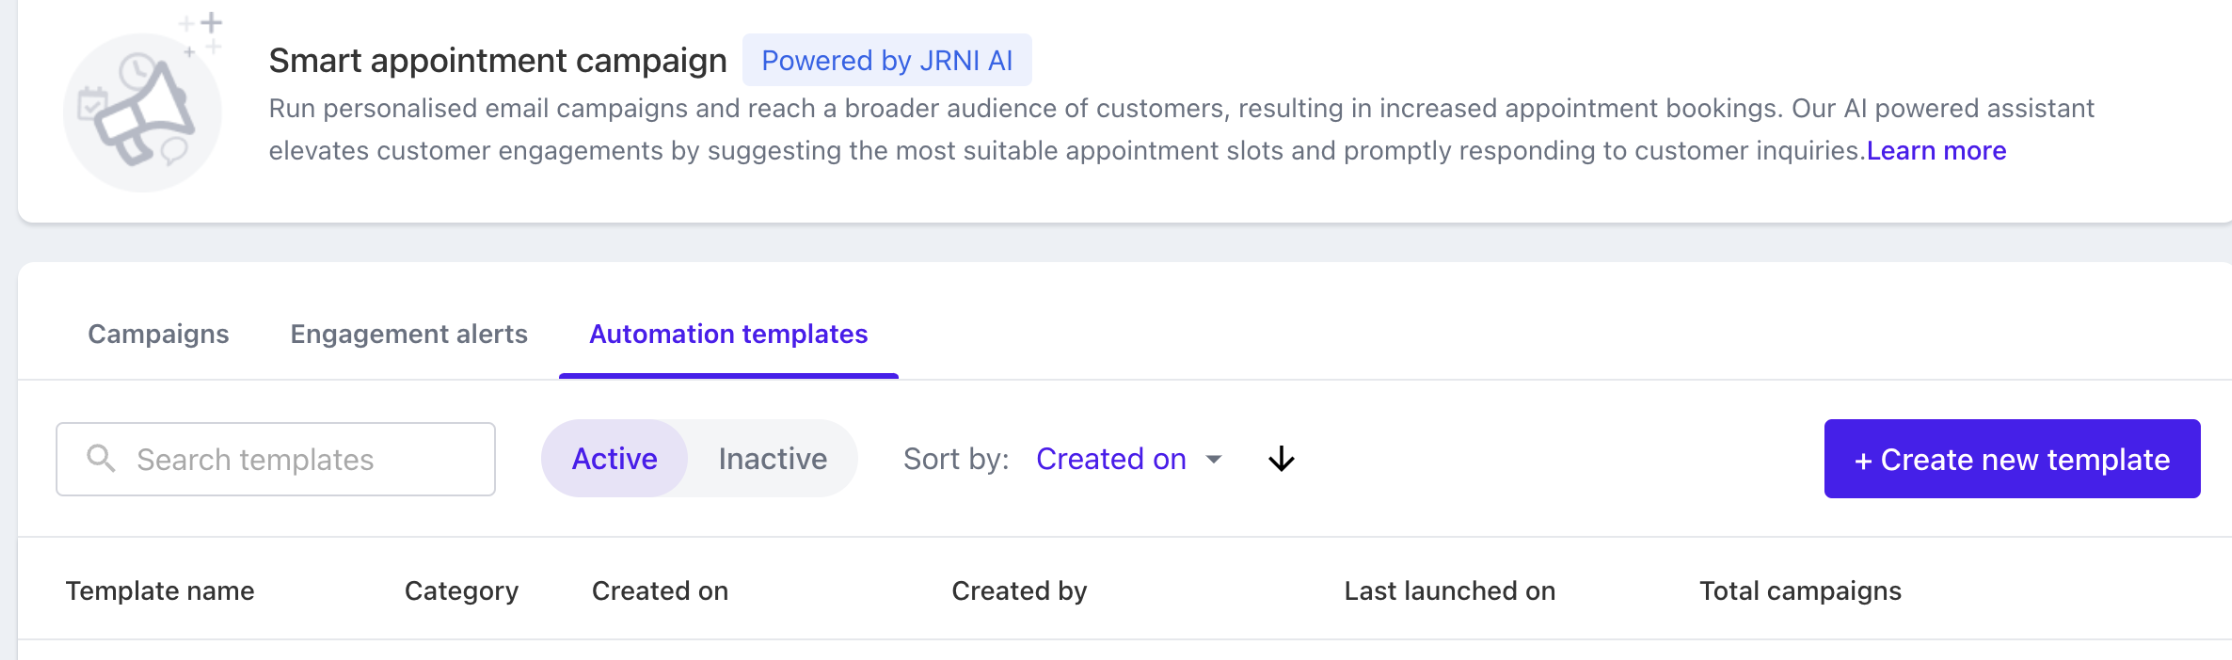
- Inside Studio, navigate to Appointment automation → Automation templates
- Click on the "Create new template" button to start creating a new template
- Fill in the basic details

- Give your template an appropriate name. This name will be shown when you are selecting a template to launch a campaign.
- Category name: Categories help to organize your campaigns. Select a category from the dropdown list.
- Status: When the status is set to "Active," the template can be used for launching campaigns.
- The virtual assistant is the Ai that interacts with the customers. Choose an automation assistant from the dropdown menu.
- Choose the maximum number of appointments that should be suggested, in the notification sent out to your customers. Remember that the number of actual slots suggested might be lower than what you selected here if availability at that time is limited.
- Lastly, you have the option to either share this template with all child companies (by checking the checkbox) or select specific child companies from the dropdown menu.
A template can be launched either directly from the list of templates (Menu -> Batch launch/Quick launch) or by creating a new campaign.
- Launch inputs
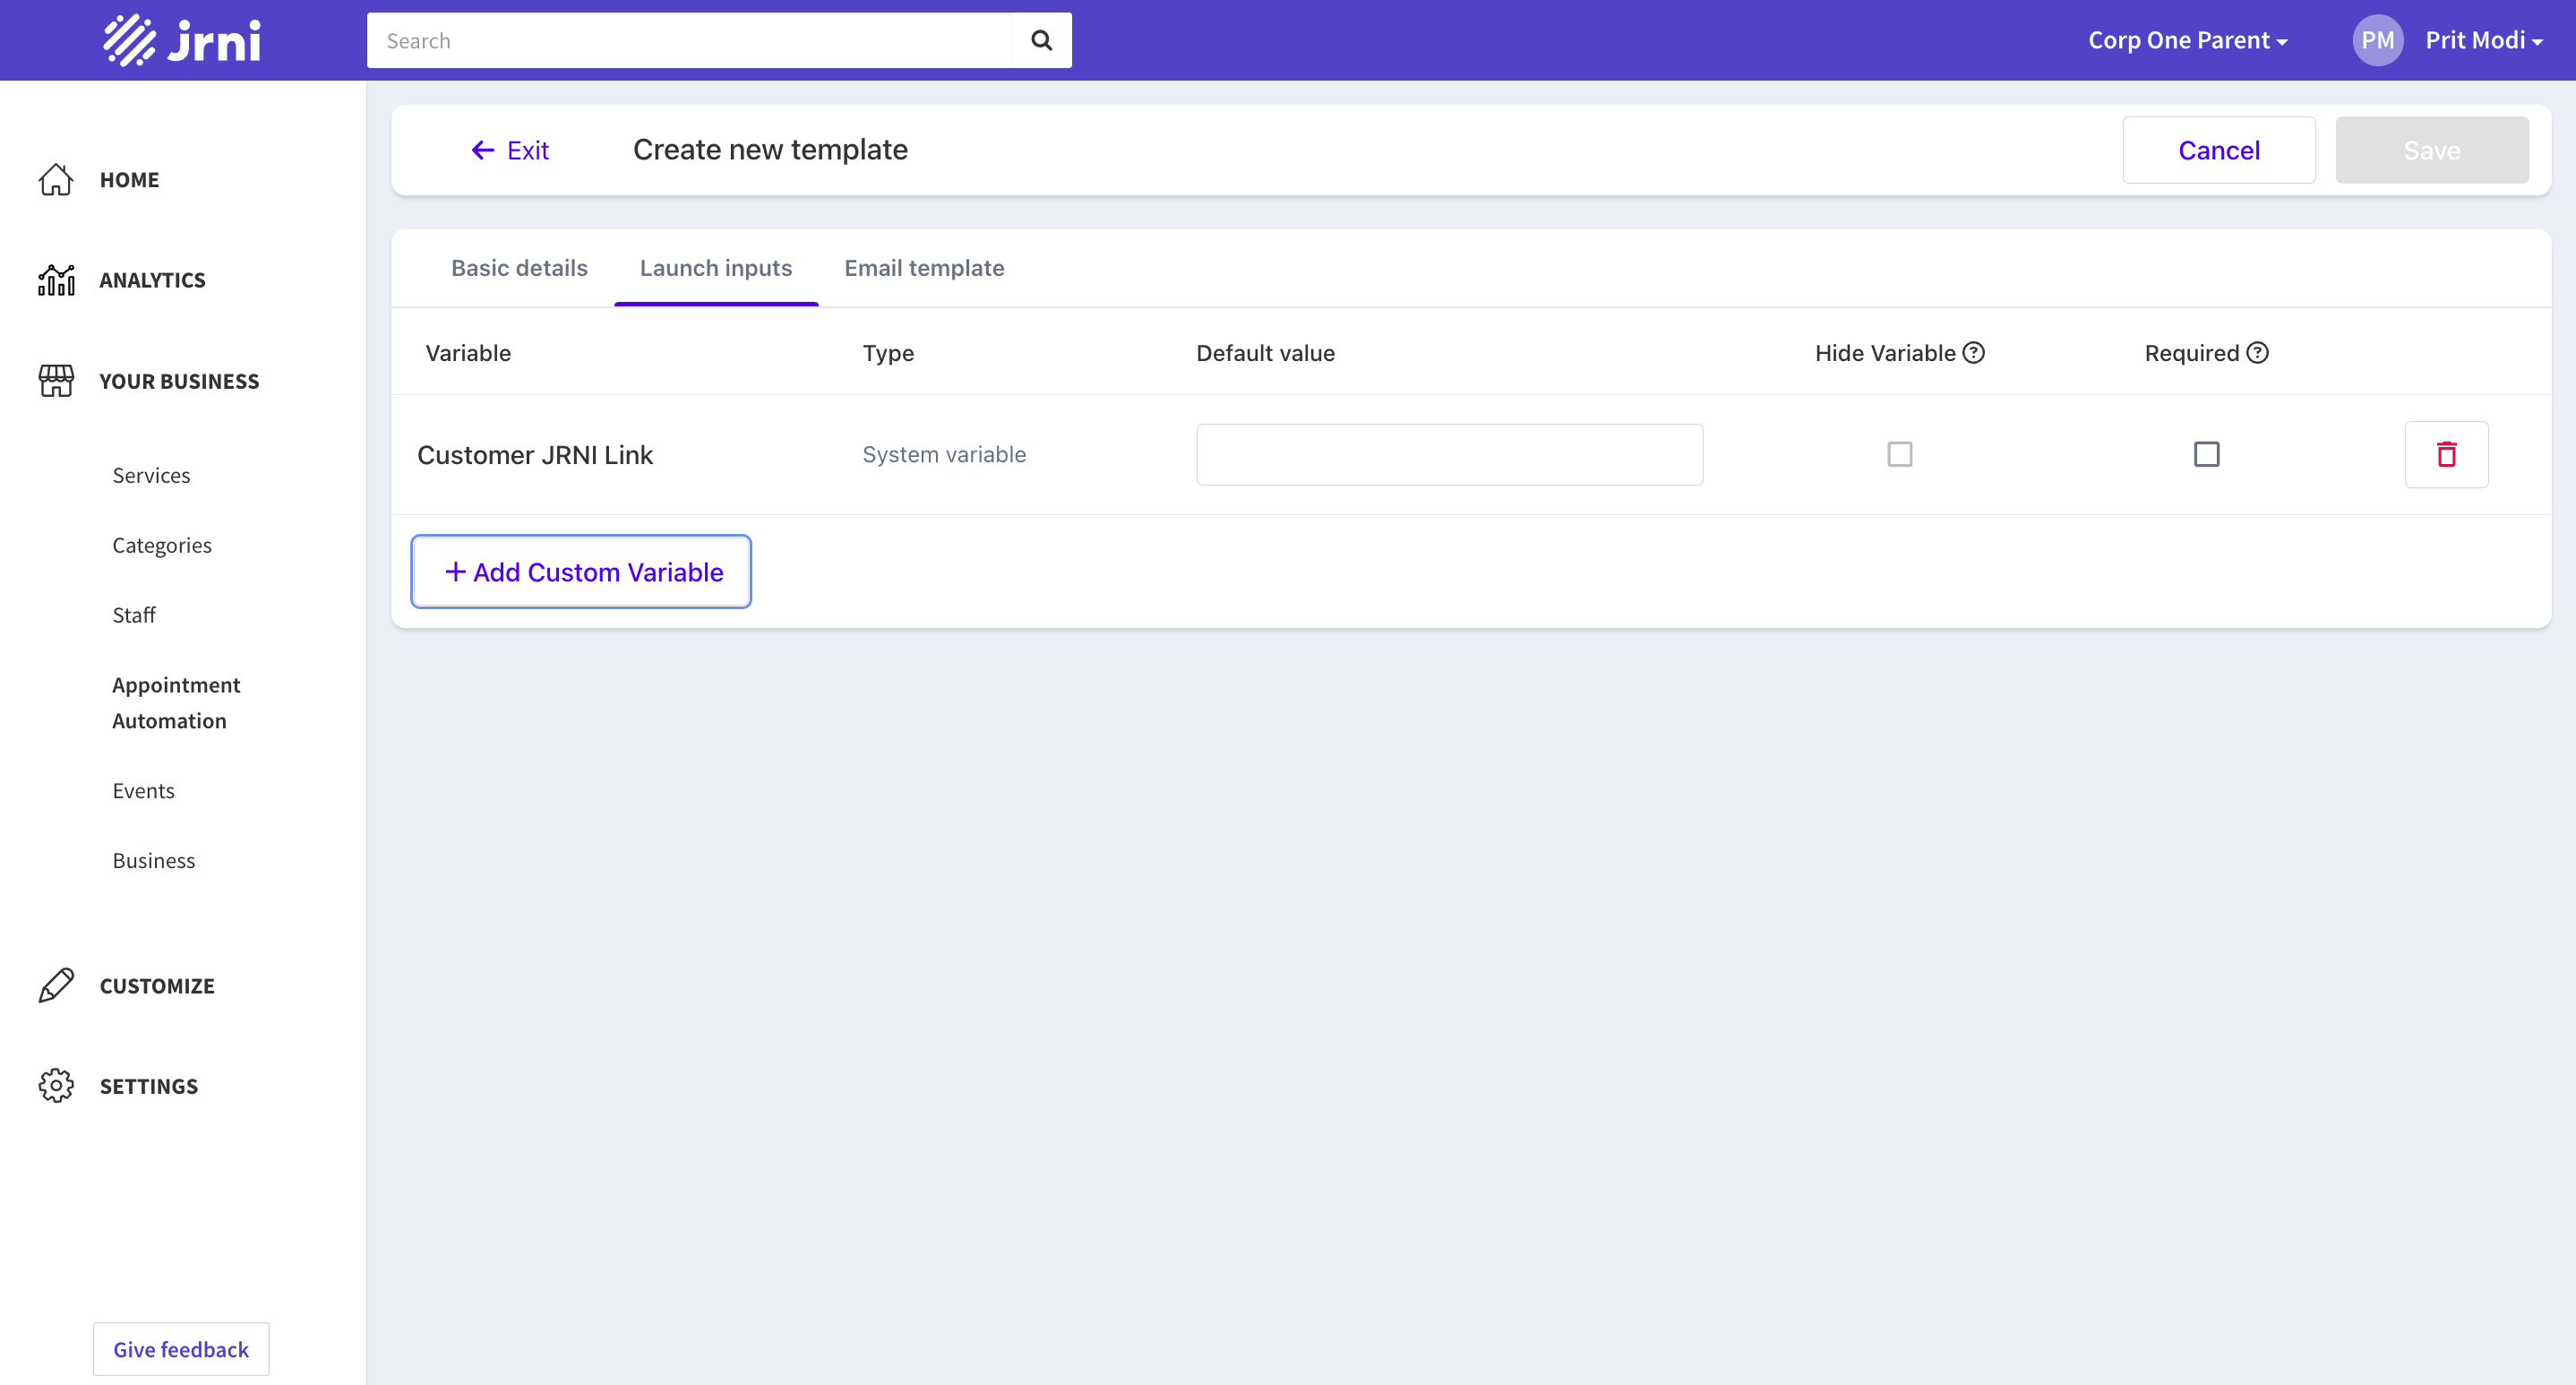
Variables are used by the Automation Engine (AME) to identify available time slots for an appointment based on service, location, and timeslots. Variables also allow you to personalize your message for each customer by linking the placeholder variable to a database of values.
- There are 2 types of variables:
- System variables are default variables that are linked from Studio such as service, customer name, customer email, etc.
- Custom variables are custom, user-created variables.
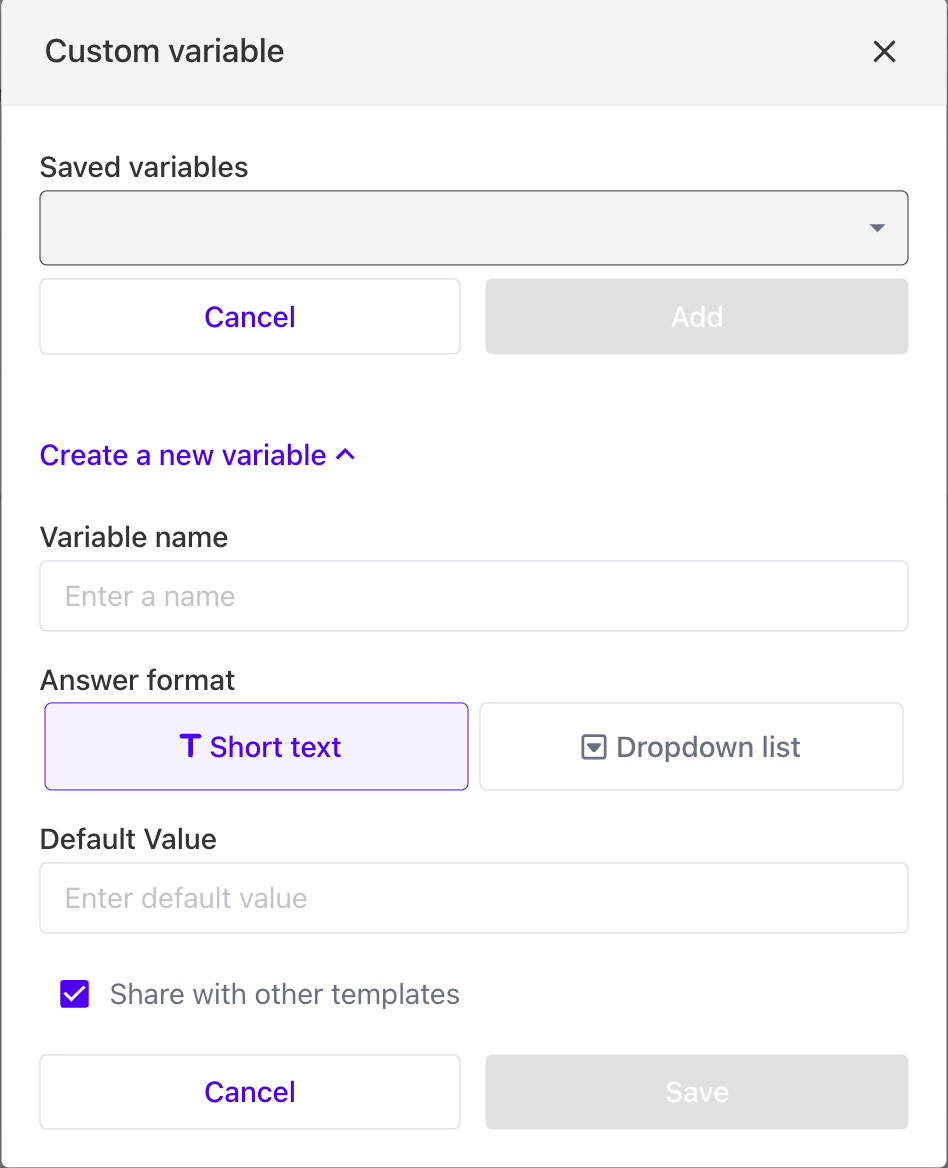
- To add a new variable to the template, click on 'Add custom variable.' You can choose from existing variables or create a new one. To create a new variable, give it a name, select an answer format, assign a default value (if necessary), and then click 'Save.' You can either share this variable across all templates or keep it exclusive to the current template.
- If there is no specific value chosen when launching a campaign, the default values that you can type in will be shown.
- Mark the hide variable checkbox to hide the variable in the campaign launch form. Please note that providing a default value is necessary to hide a variable.
- To make the variable mandatory to answer in the campaign launch form, please mark the required checkbox.
- E-mail template
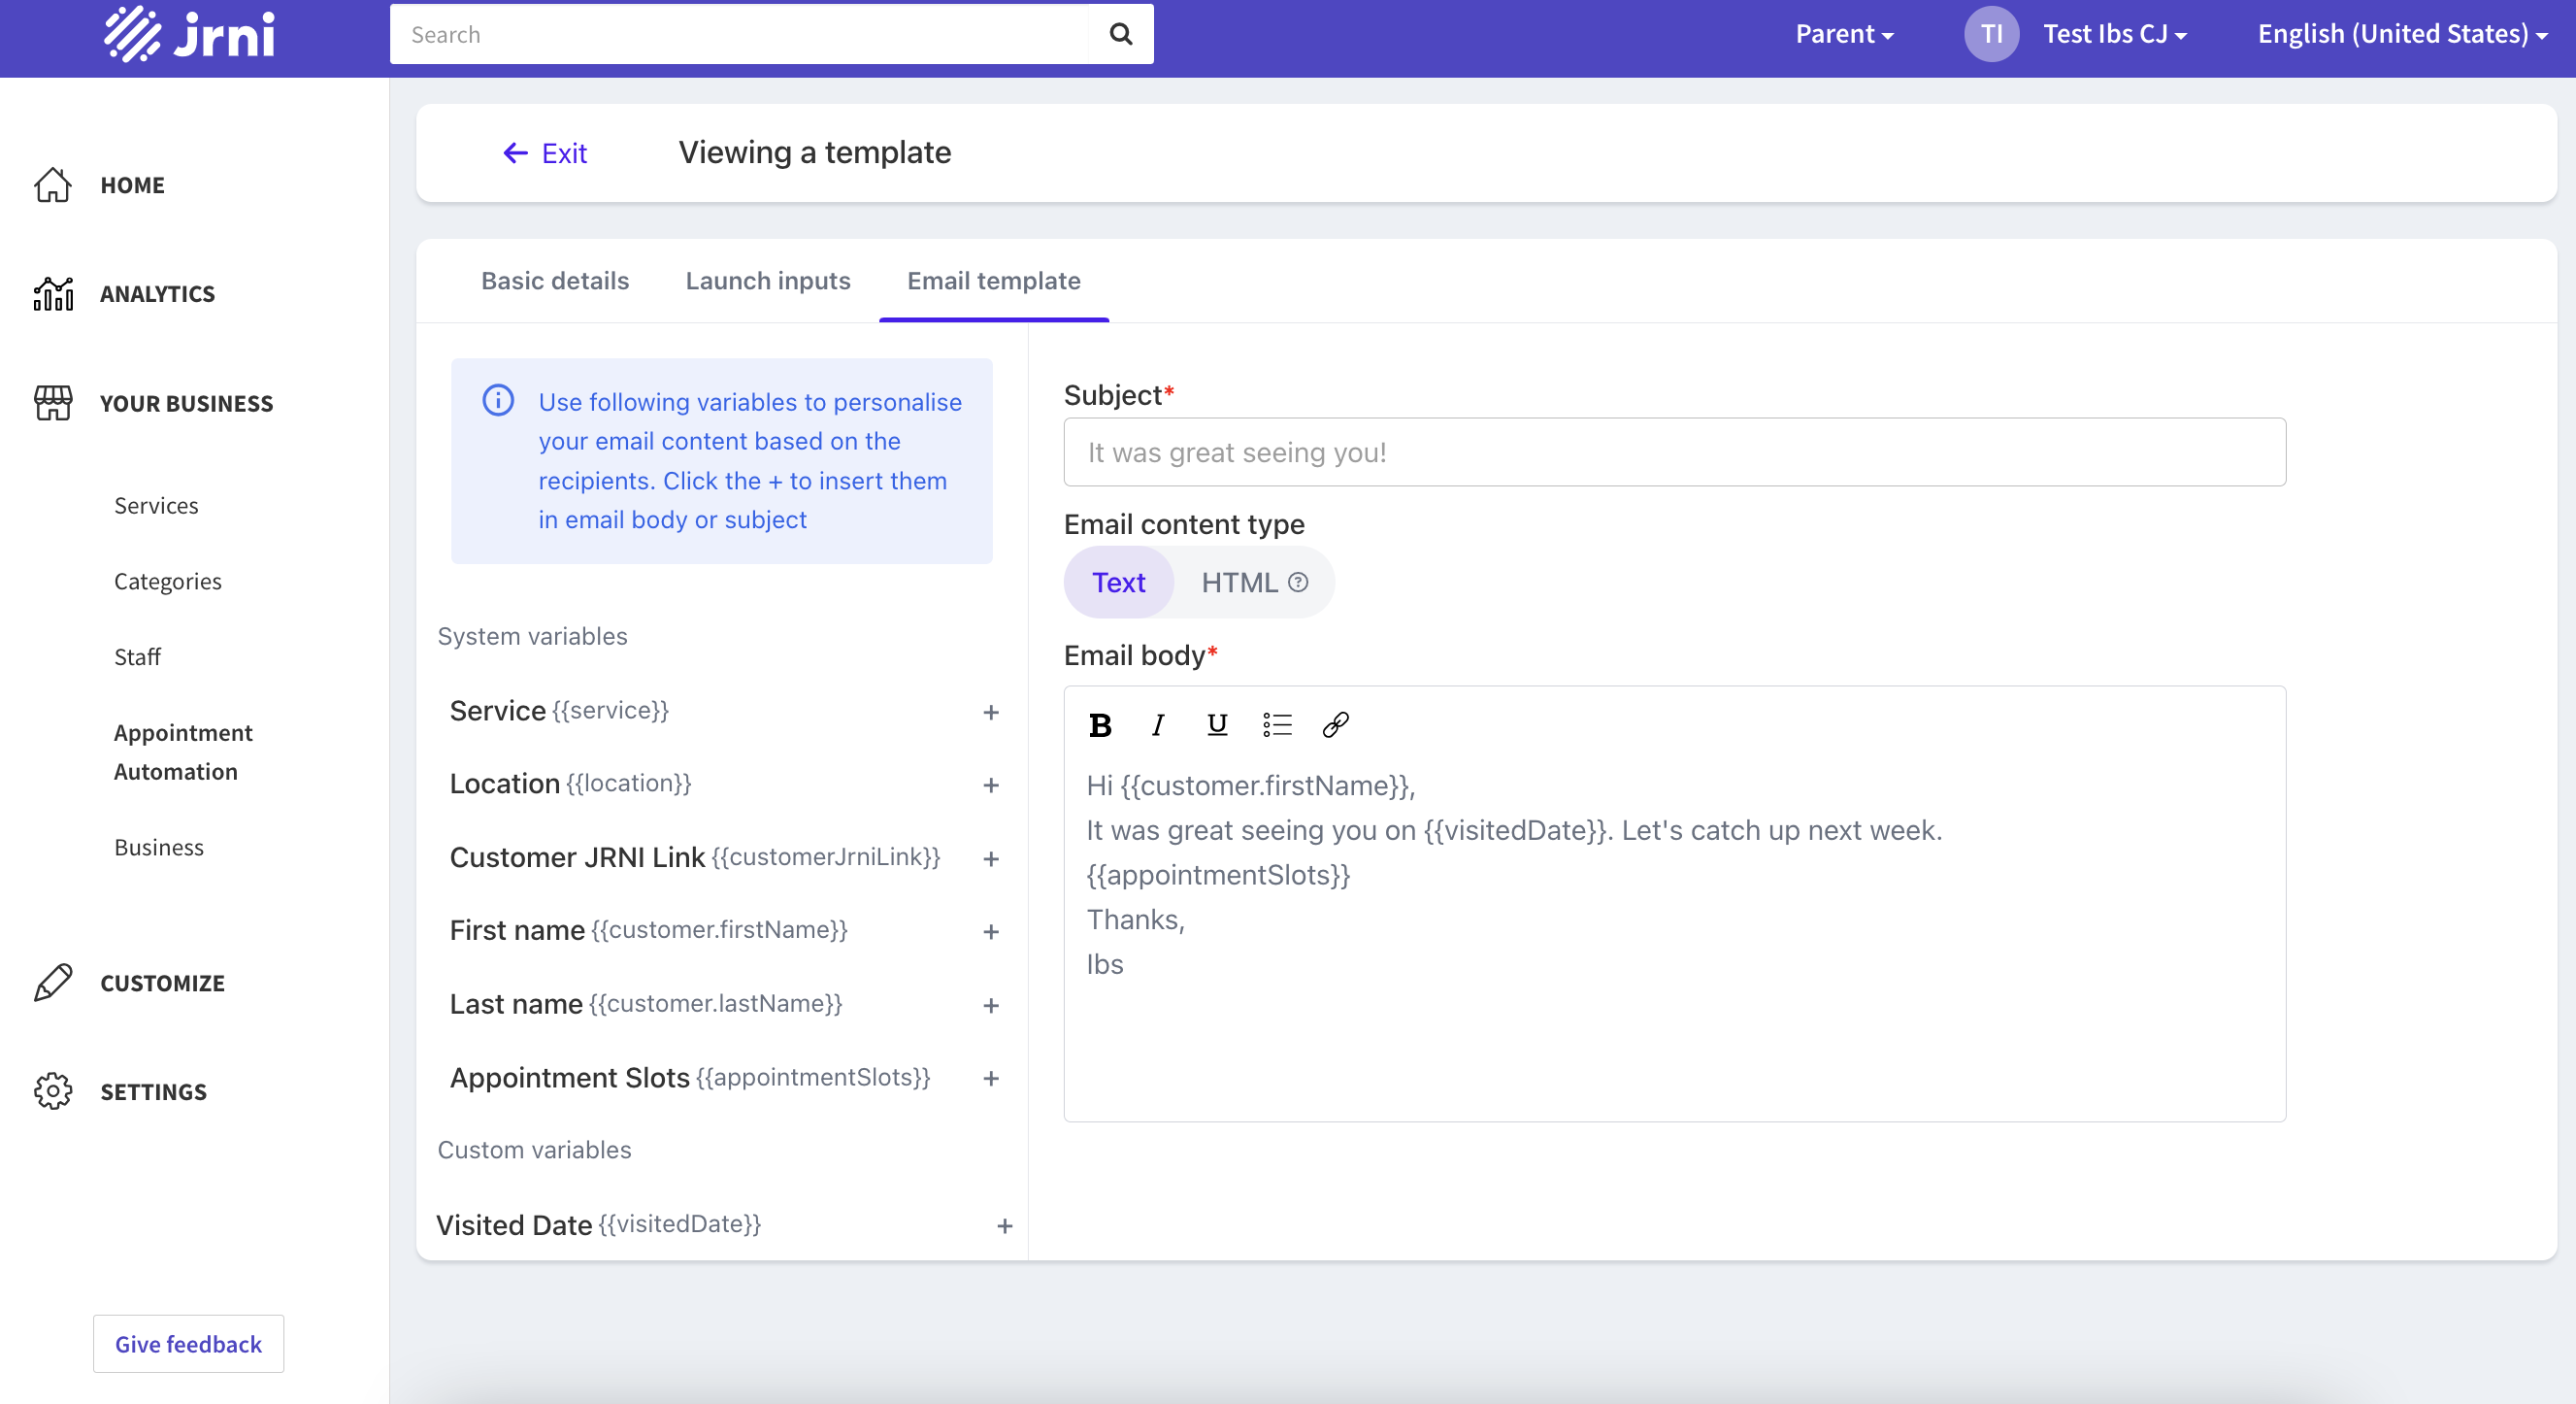
- Please fill in a subject line and type a custom e-mail
- The variables you have added in the launch inputs section will be available for use within the email template. To add a variable to the template, simply click on a variable shown in the box on the left, or type the variable code.
- You can apply custom basic styling by switching to HTML content.
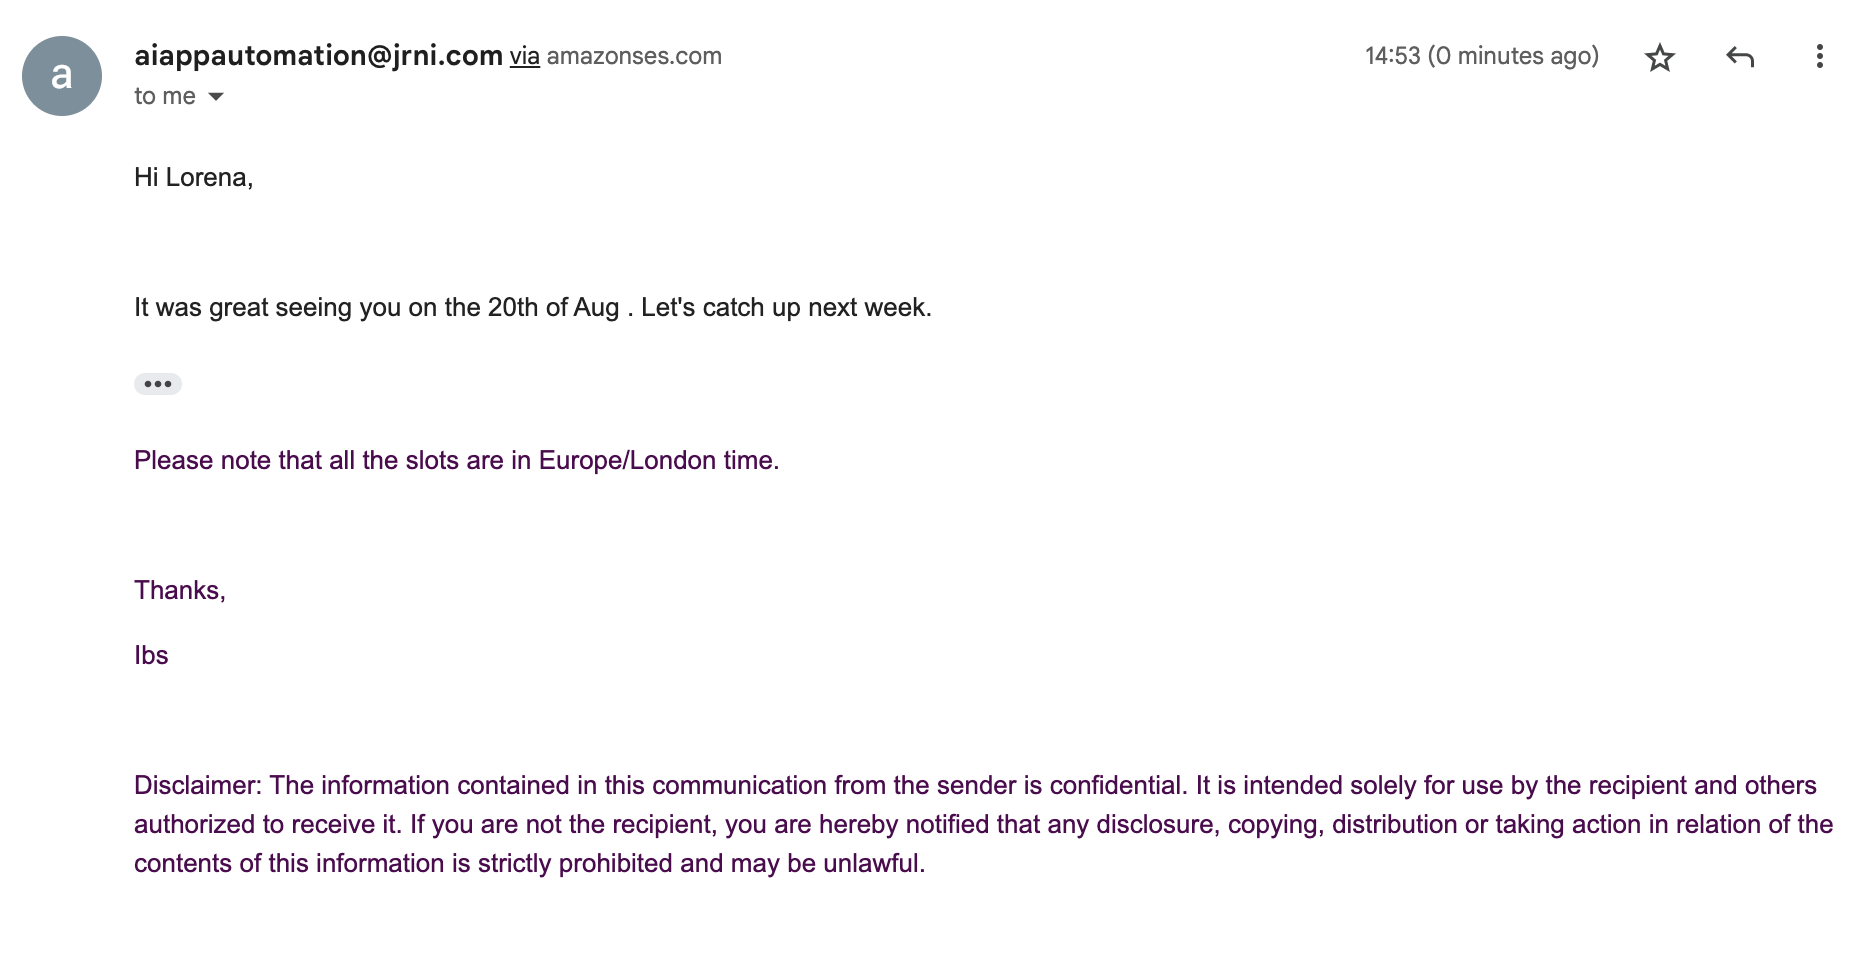
The email sent out to customers in this example will look like this:
Once you have filled out all required fields, you will be able to save the template.
2. Campaigns
After creating a template, you can start launching a campaign with it.
Campaigns enable you to send promotional emails to multiple customers simultaneously, with the ability to monitor each customer's progress throughout the campaign. Our JRNI AI identifies the customer's intent from their responses and responds accordingly. The JRNI AI is capable of booking appointments and sending follow-up emails. If the AI cannot detect the customer's intent, it will alert you to intervene manually by sending an engagement alert.
In the overview, you can see the list of all campaigns, filter showing them by active and inactive, search for campaigns and launch a new one.

Launching a campaign
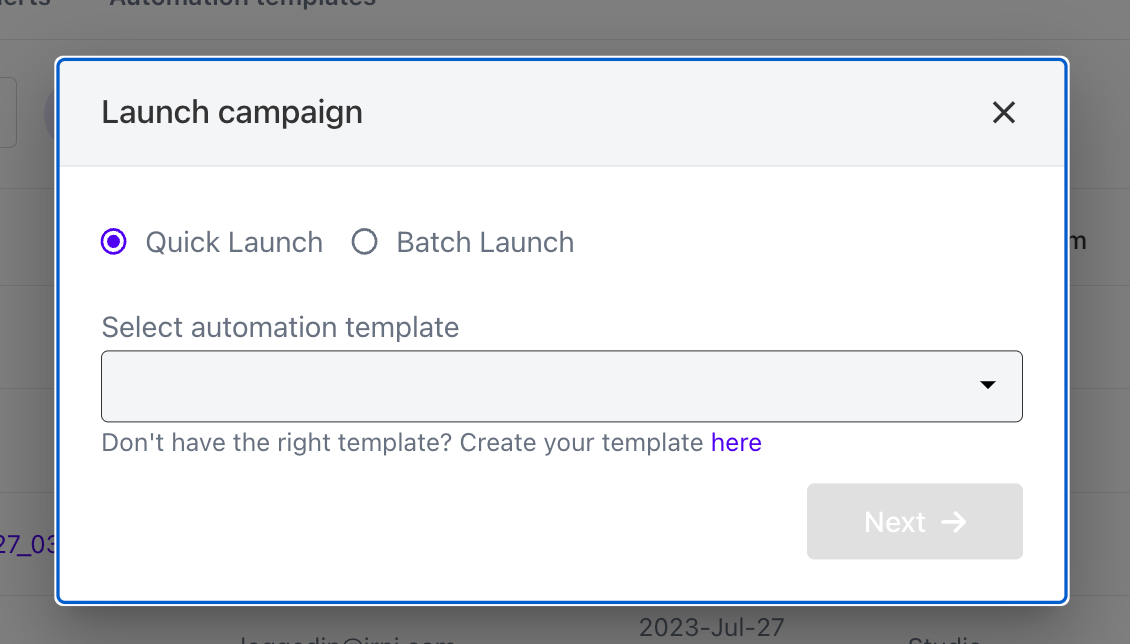
- Click on ‘Launch campaign’, select an automation template, and then click next.
- Choose how you would like to launch your campaign:
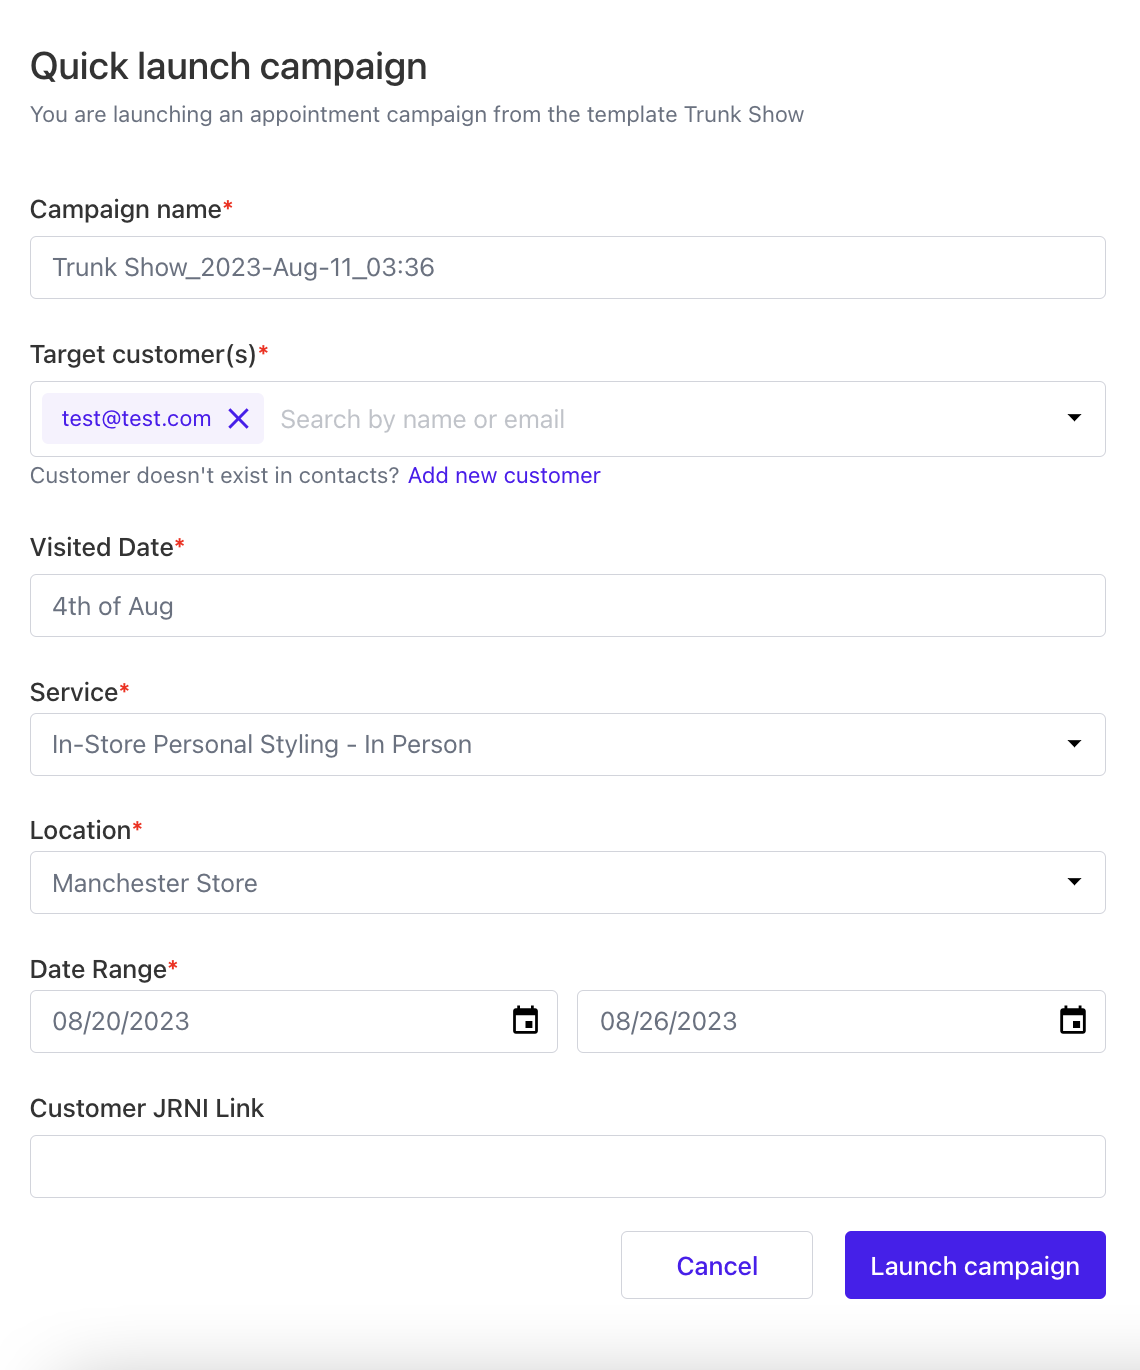
- Quick launch:
Effortlessly send emails to multiple customers with a single set of values for all variables per customer. Simply fill out the form and when you are ready click on ‘Launch campaign’.
Search for customers that you want to send the communication to by typing in their name or email, if they are not logged in the system yet you can click on "create new customer" below the input field.
You can fill out the date the customer initially visited/interacted with you to refer to it and select a service that you want to recommend appointment slots form incl. the location and a date range for which these appointment slots should be suggested.
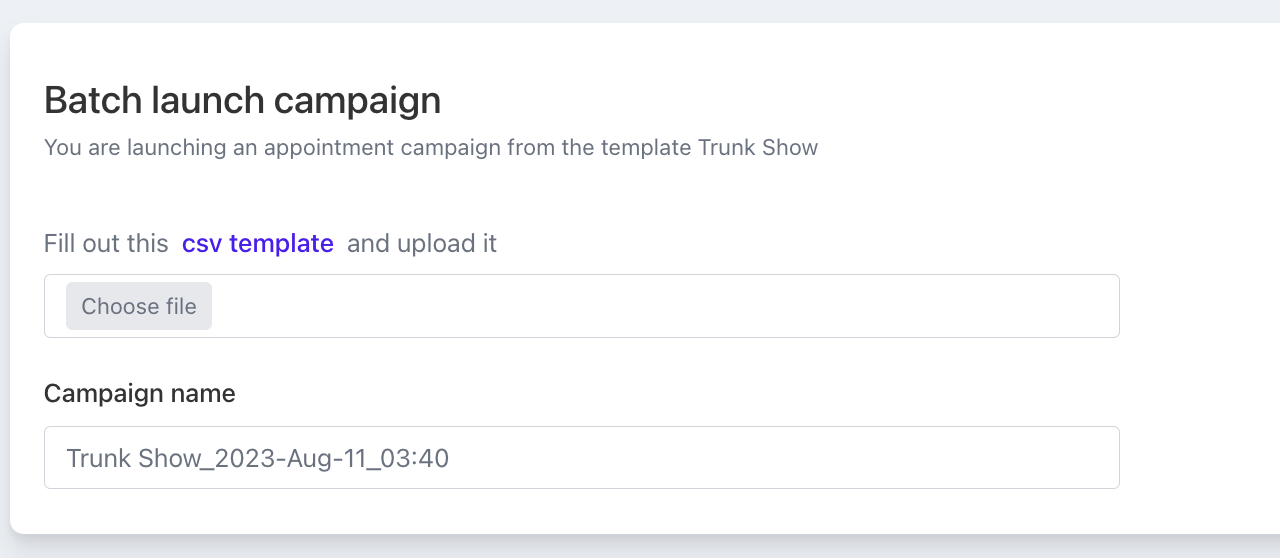
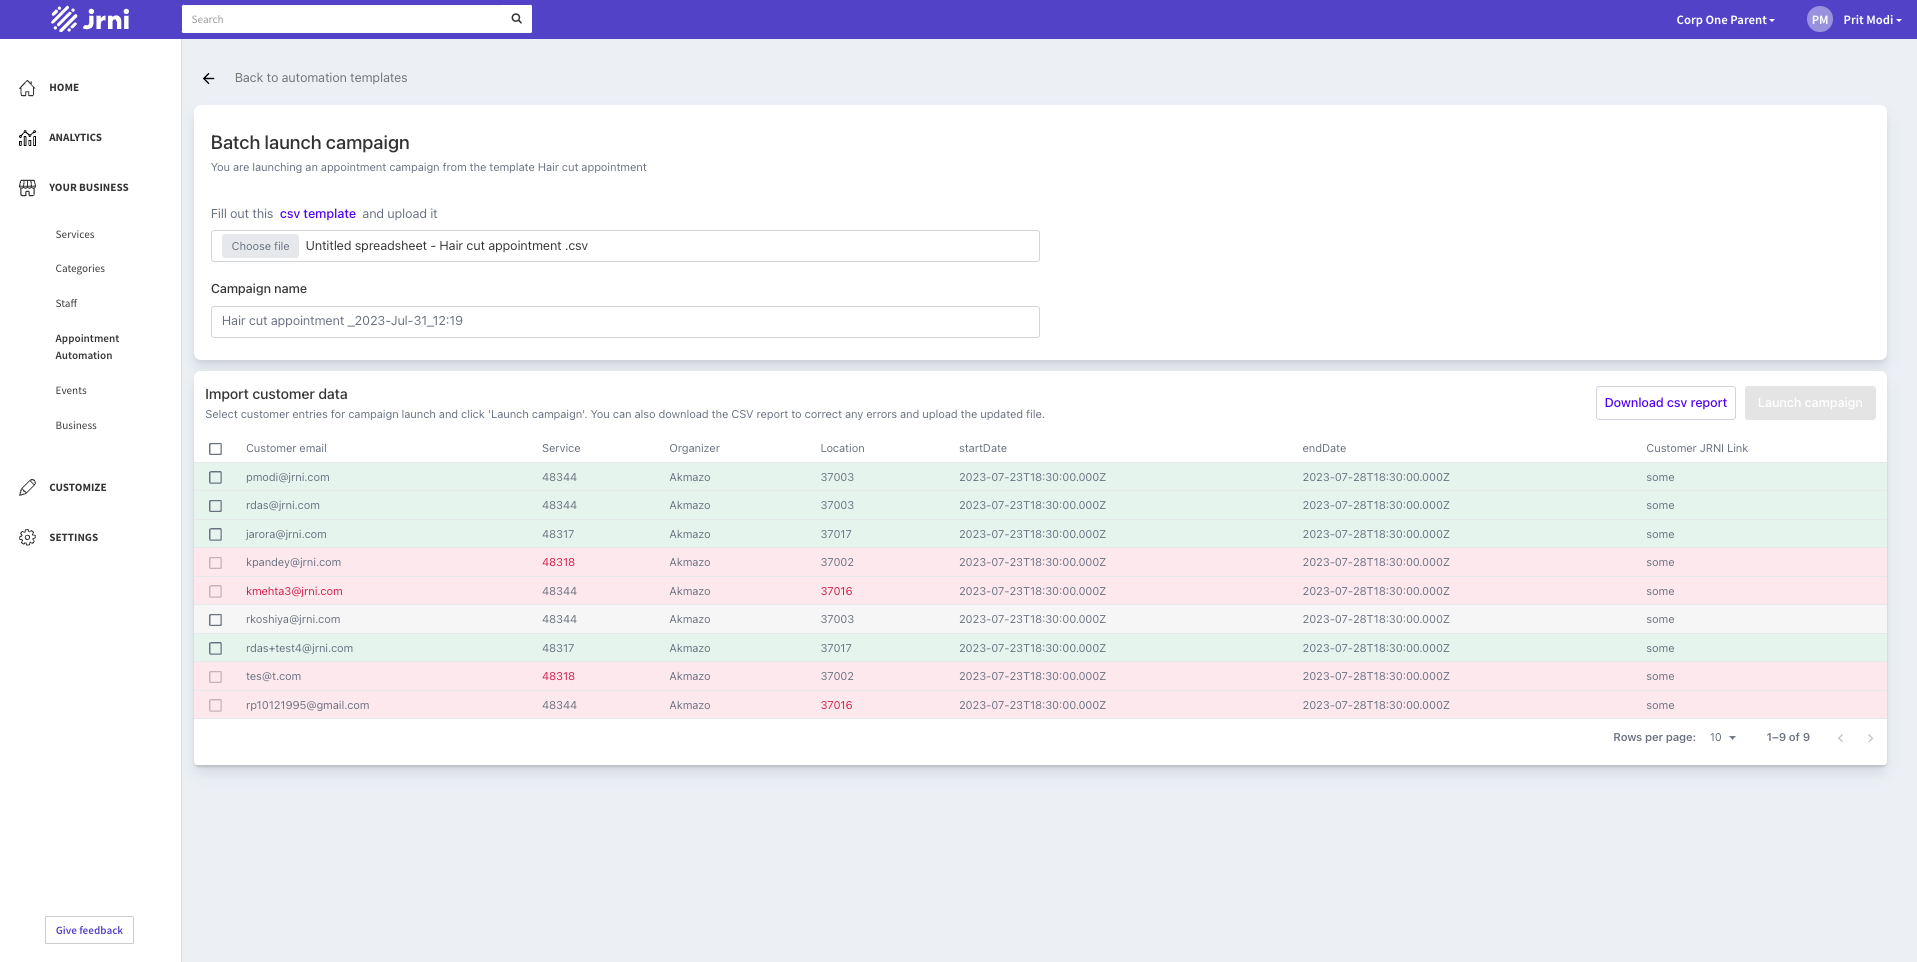
- Batch launch:
Personalize appointment suggestions and email by assigning different sets of values for variables based on individual customers.
To initiate a batch launch, download the provided CSV template and input the required details and variable values for all targeted customers. After uploading the filled-out file, the system will process the data and present the outcome. Rows in green are valid and can be chosen for campaign launch, while those in red require adjustments before proceeding. You can also download the CSV report outlining error details for invalid rows, correct the issues, and re-upload the file.
Once ready, individually select the rows you wish to include in the campaign or collectively mark all valid rows. When you are happy with the content, click on 'Launch Campaign'.
Customer engagements
You can view and manage the customer's responses to your campaigns by selecting a campaign from the list and clicking "View" in the three-dot action menu.
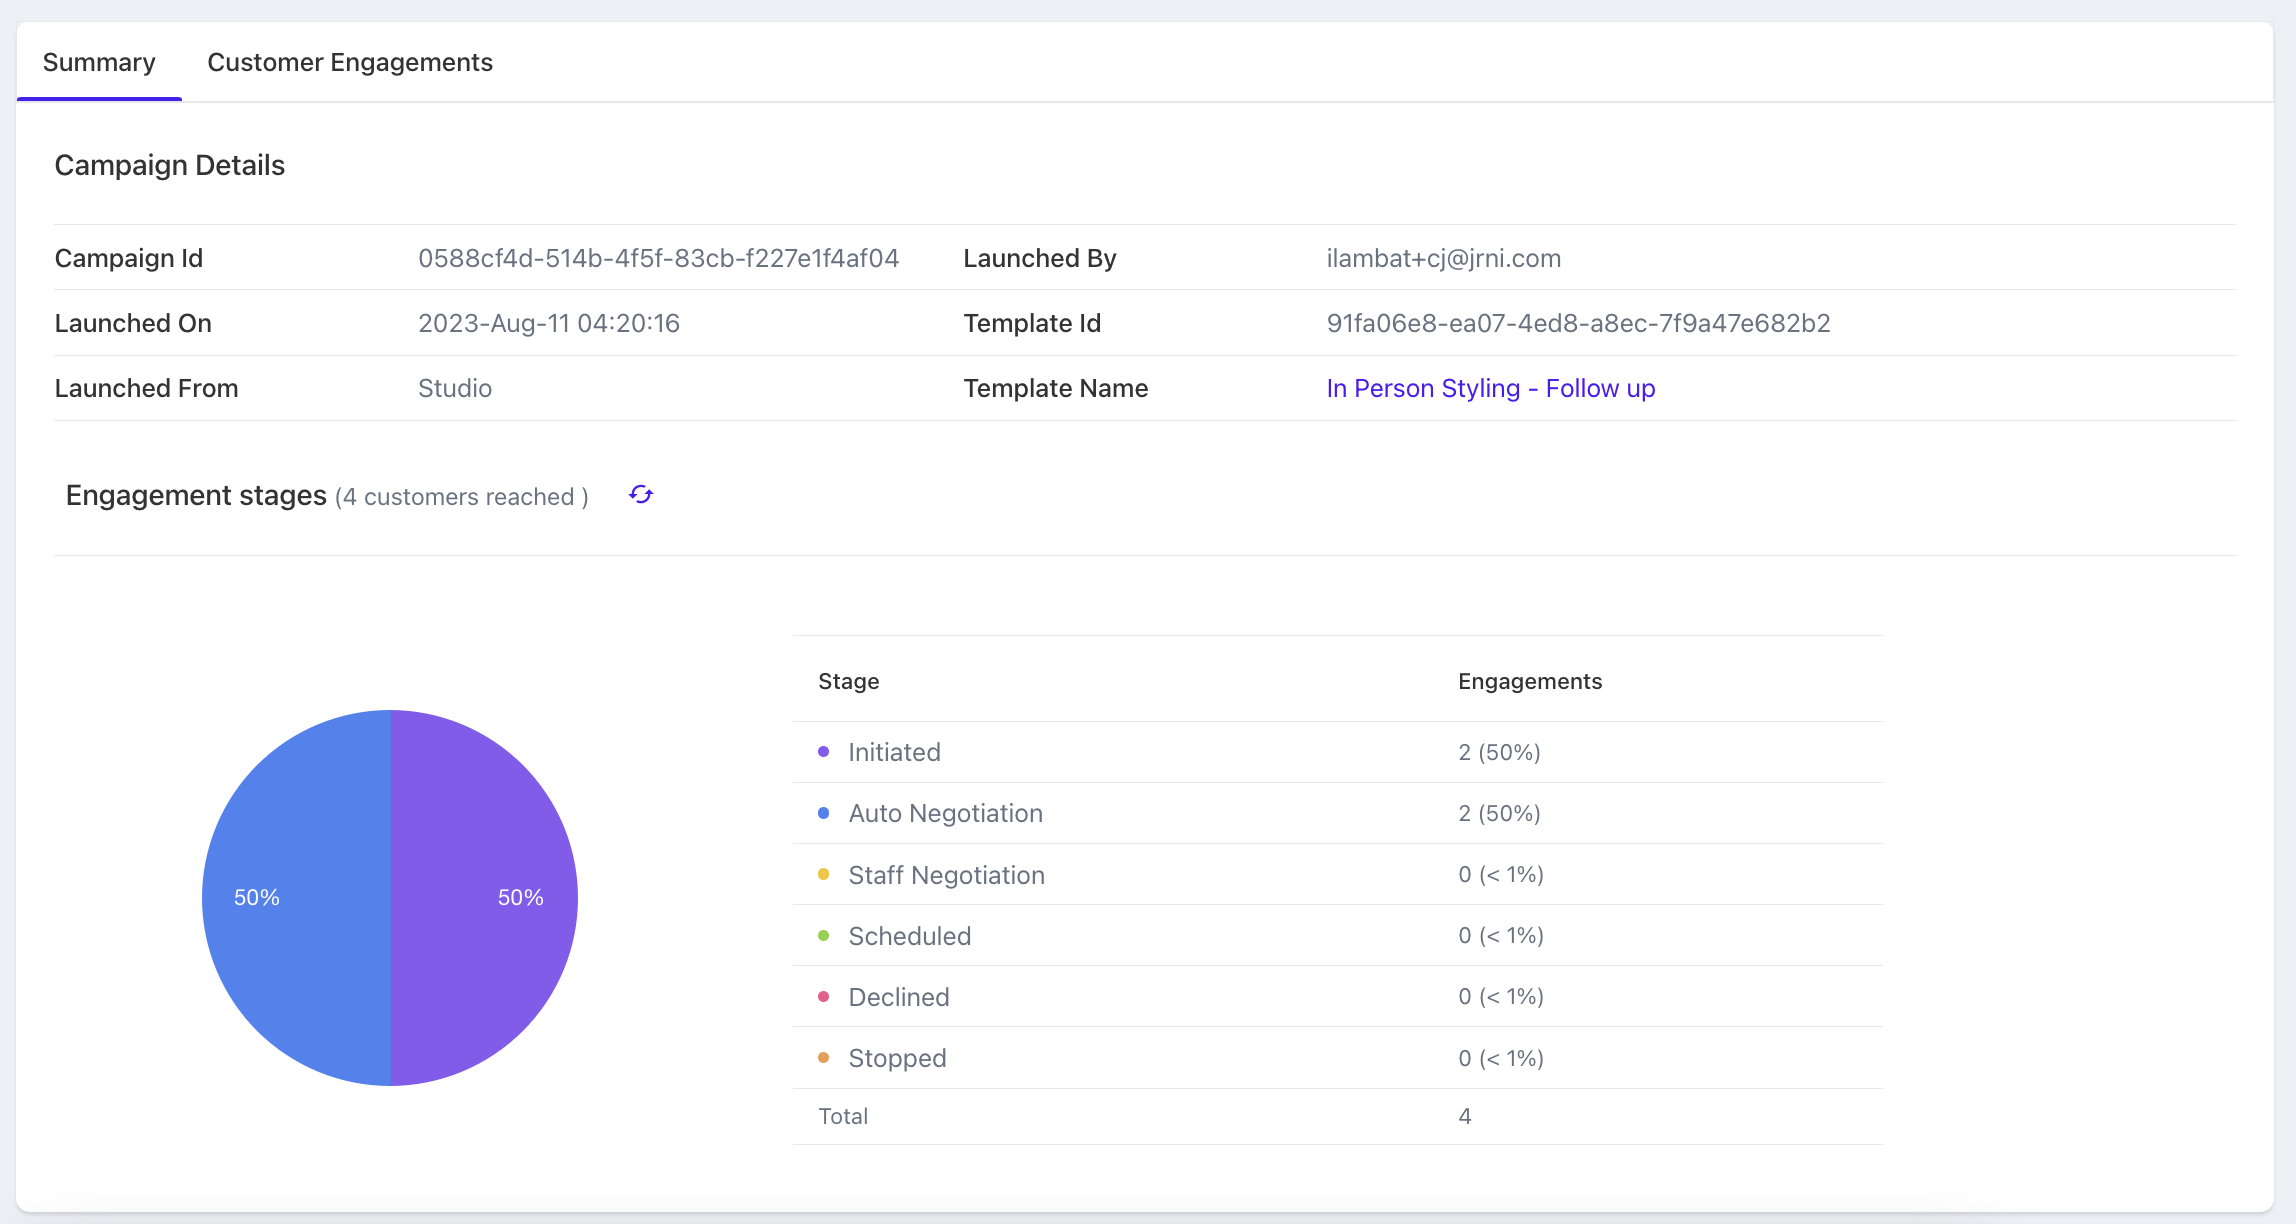
In the summary, you will see the info on the campaign and the customer responses in their different states.
- Initiated: The campaign is launched and the first email was sent to the customer
- Auto-negotiation: When a customer replies to the initiation email, the JRNI AI promptly identifies their intent and responds accordingly (incl. stopping the interaction or booking an appointment). In cases where the intent isn't recognized, an engagement alert will notify you to intervene. Within this alert, you have the option to personally reply to the customer or assign a staff member to do this. If a staff member was assigned, the interaction transitions to the staff negotiation stage.
- Staff negotiation: At this stage, the assigned staff will be notified of the engagement. The staff may continue the conversation with the customer manually.
- Scheduled: If the JRNI AI books an appointment for the customer, the engagement will move to the scheduled stage
- Declined: If the customer declines the appointment offer, the engagement will move into the declined stage
- Stopped: Upon clicking ‘Stop engagement’, the engagement stops entirely
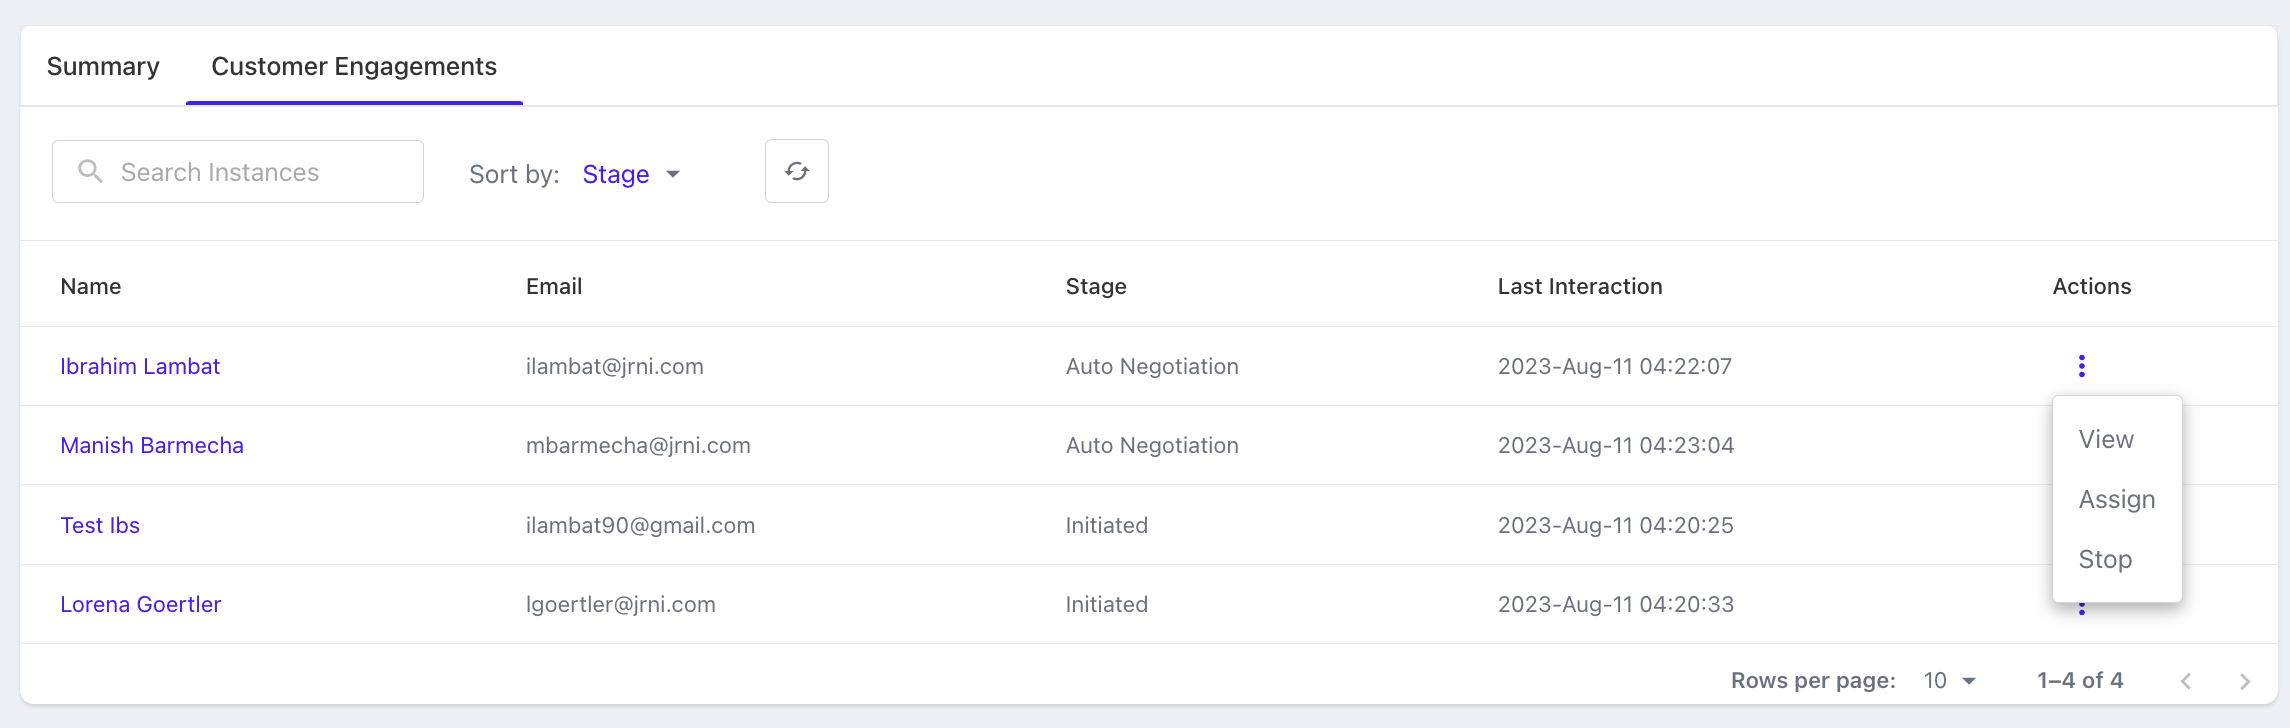
Under customer engagement, you can see the list of all customers that you engaged with, with the option to assign an engagement to you (for manual communication), stop an engagement(which ends communication with the customer), and view (which opens a page showing the thread of emails sent between the Ai/staff and the customer).
To assign a new staff just click on assign again and select a new staff.
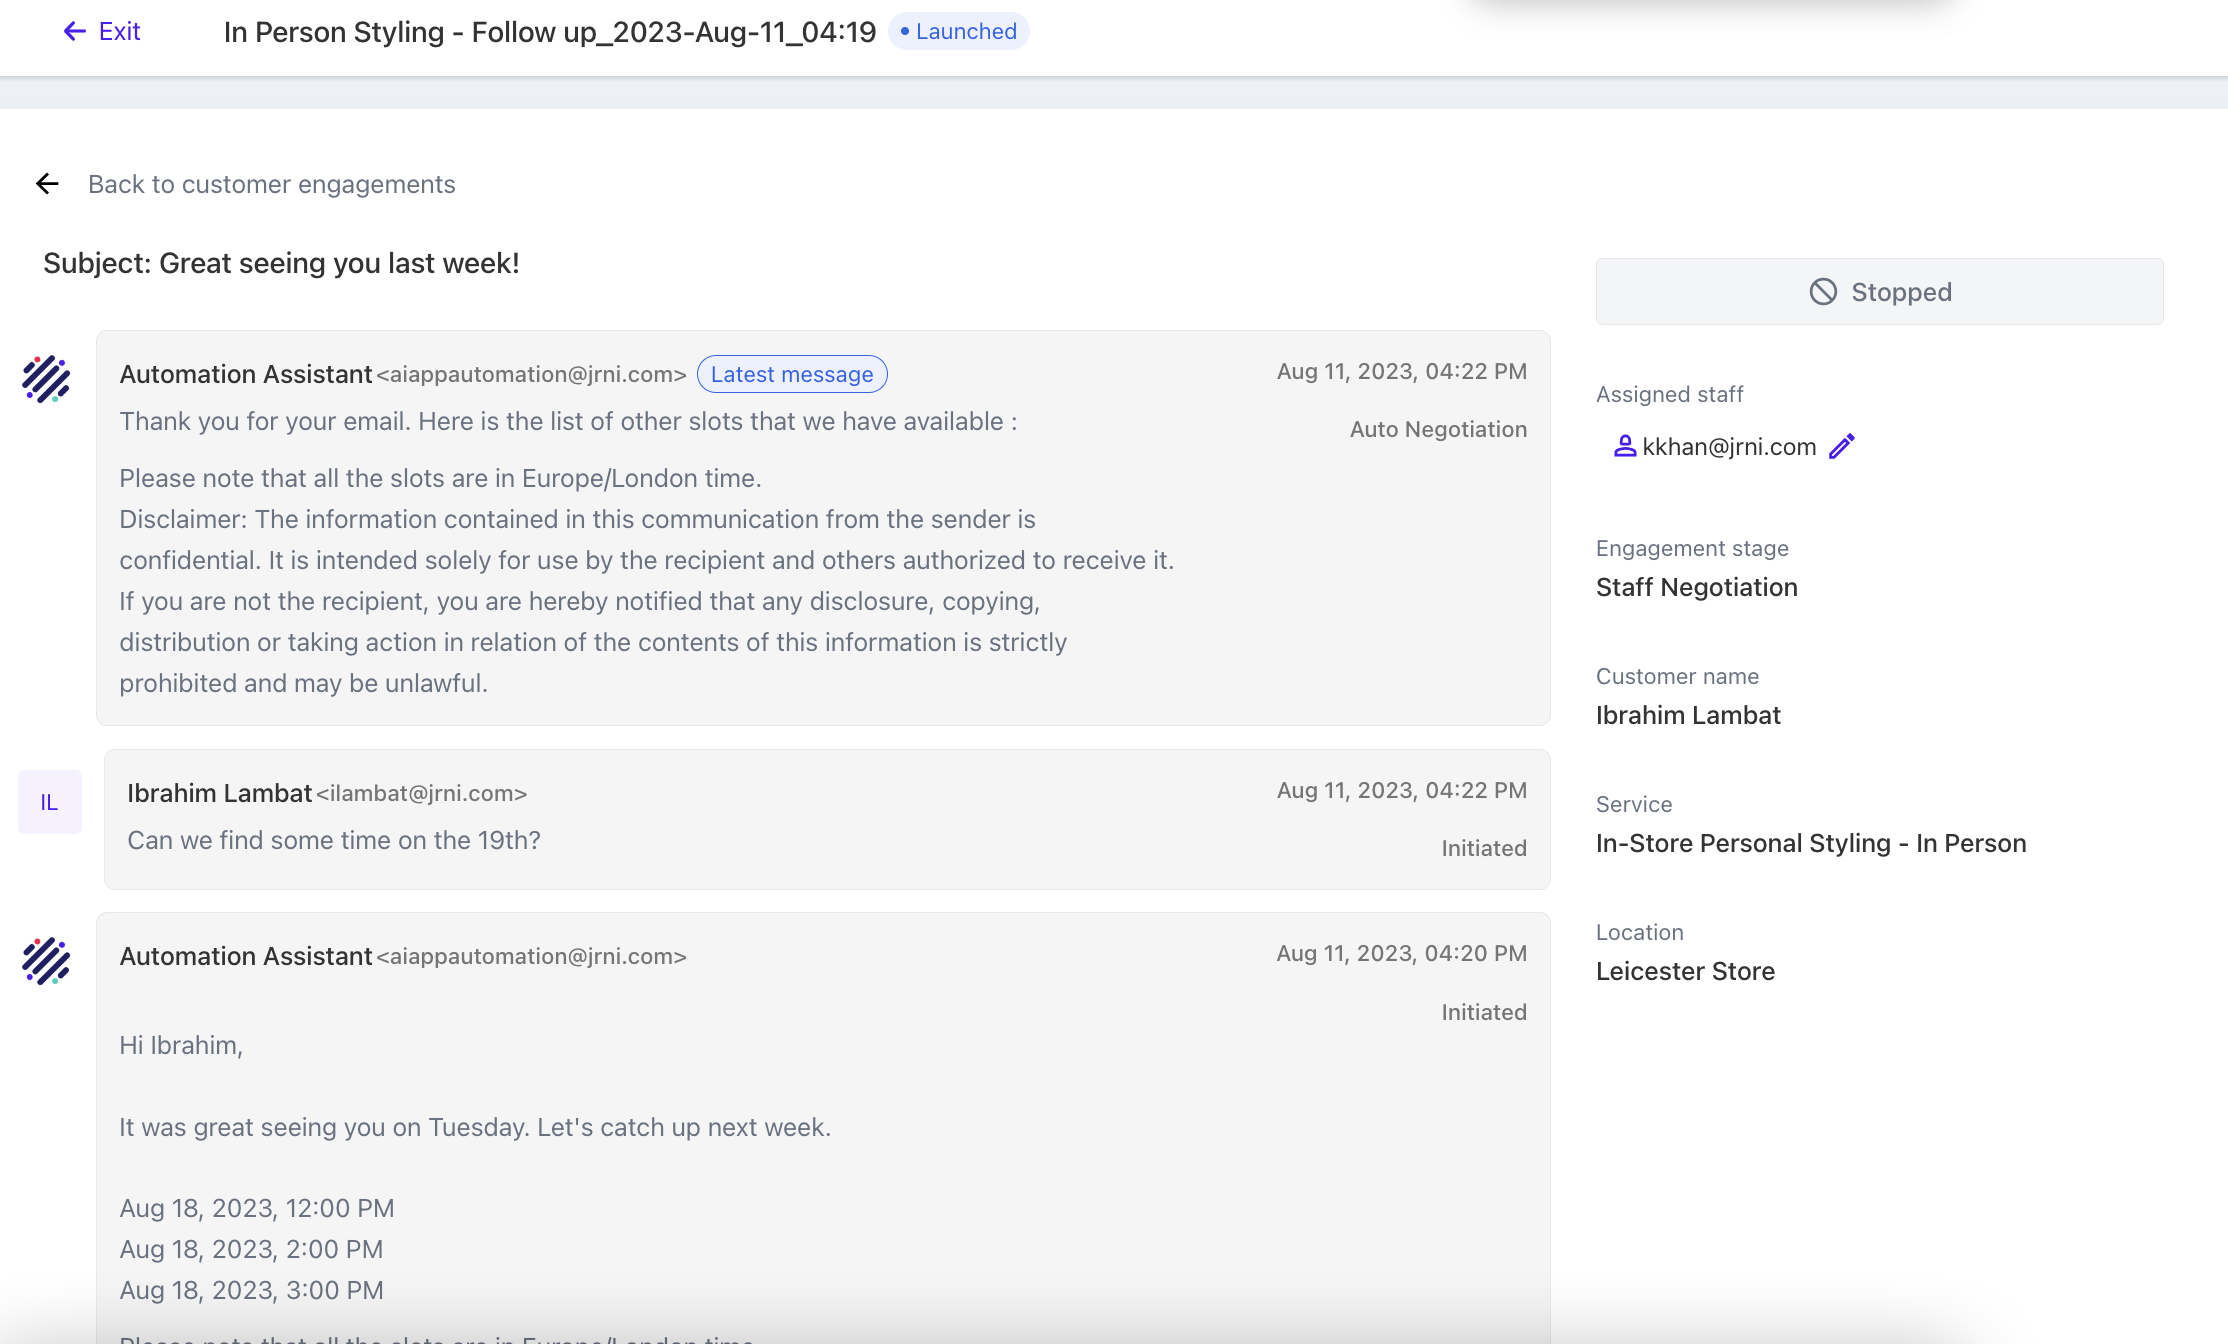
Viewing a customer engagement
You can view all messages sent between the Ai (or staff if a staff was assigned for manual communication) by viewing the campaign, clicking on customer engagement and then viewing the engagement of a specific customer.
Engagement alert
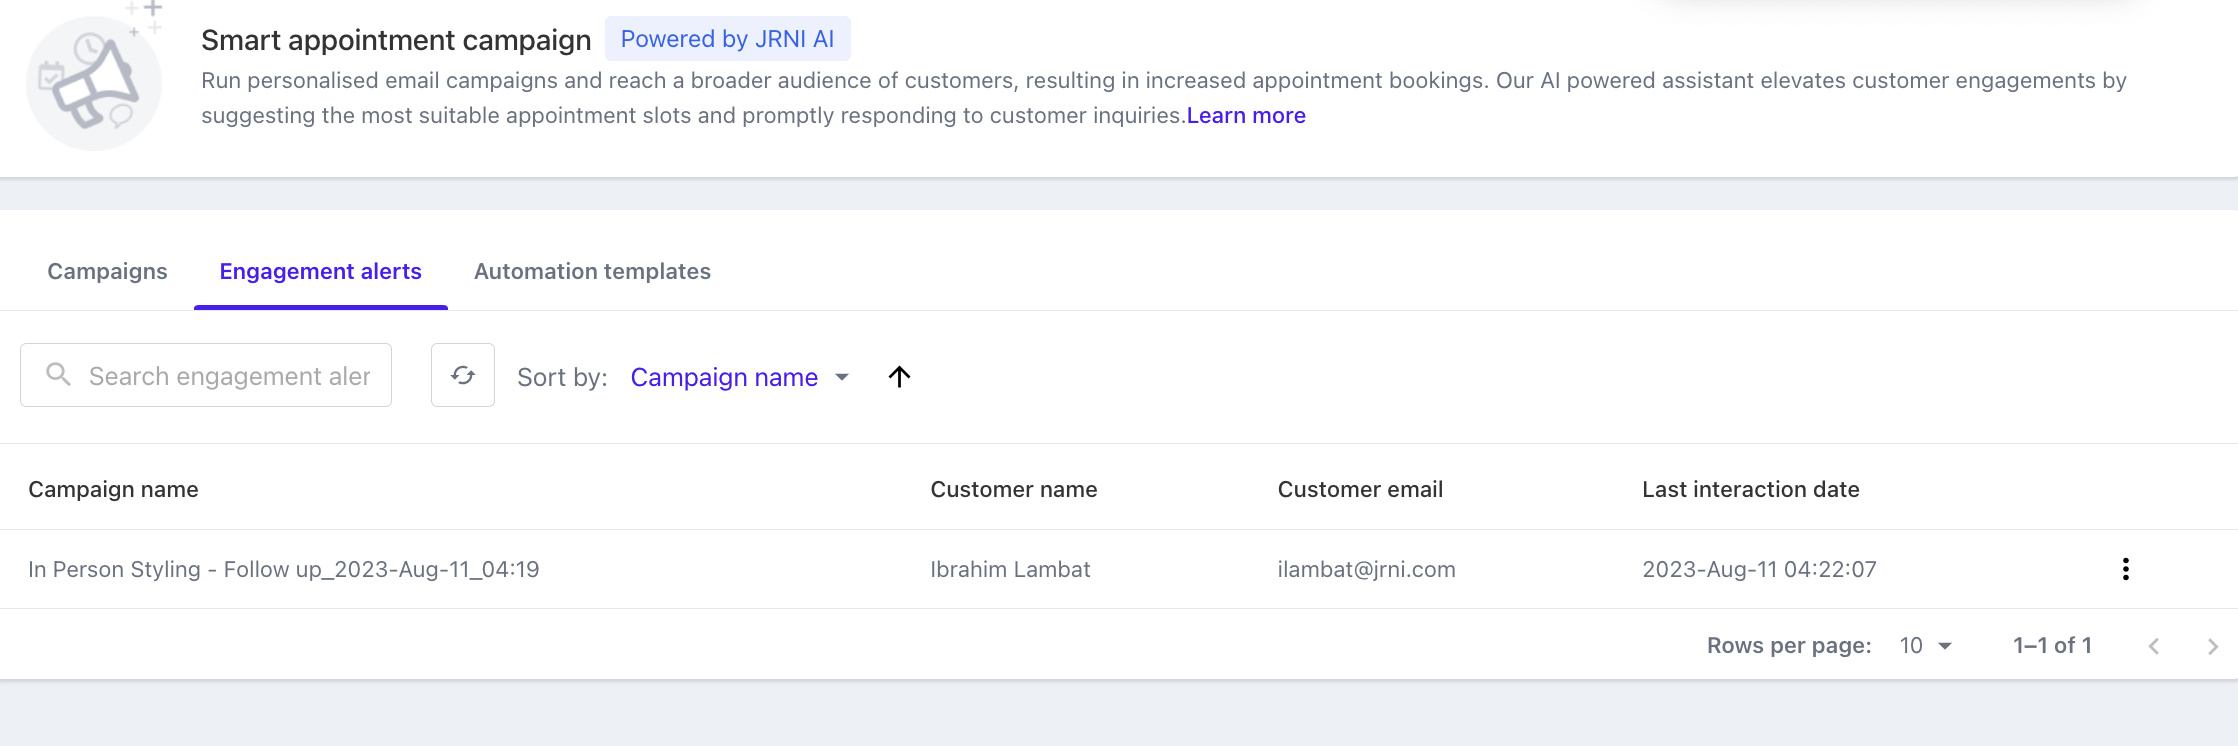
If the JRNI AI cannot recognize the intent from a customer response email, it will alert you to intervene by sending an engagement alert. All responses that require your manual response, are collected under the "Engagement alert" tab. Here, you have the option to personally reply to the customer.
- Staff Actions: You can assign a staff member to take control of an engagement. They can review the response generated by the AI, make necessary edits, and send the email. After sending, they can mark the alert as complete by choosing one of the following options:
- Booked by Staff: This will transition the engagement to the 'Booked' stage.
- Canceled by Staff: The engagement will move to the 'Declined' stage.
- Rescheduled by Staff: The engagement will move to the 'Booked' stage. If it was already booked, it will remain there.
- Declined by Customer: The engagement will move to the 'Declined' stage.
- Approved and Sent: If the staff approves JRNI AI's response and sends it, the engagement will return to the 'Auto-Negotiation' stage.
- Edited and Sent: If the staff requests other slots or info, the engagement will return to the 'Auto-Negotiation' stage.
Automation settings
Under Settings--> Automation Settings, there are a number of settings tied to appointment automation.
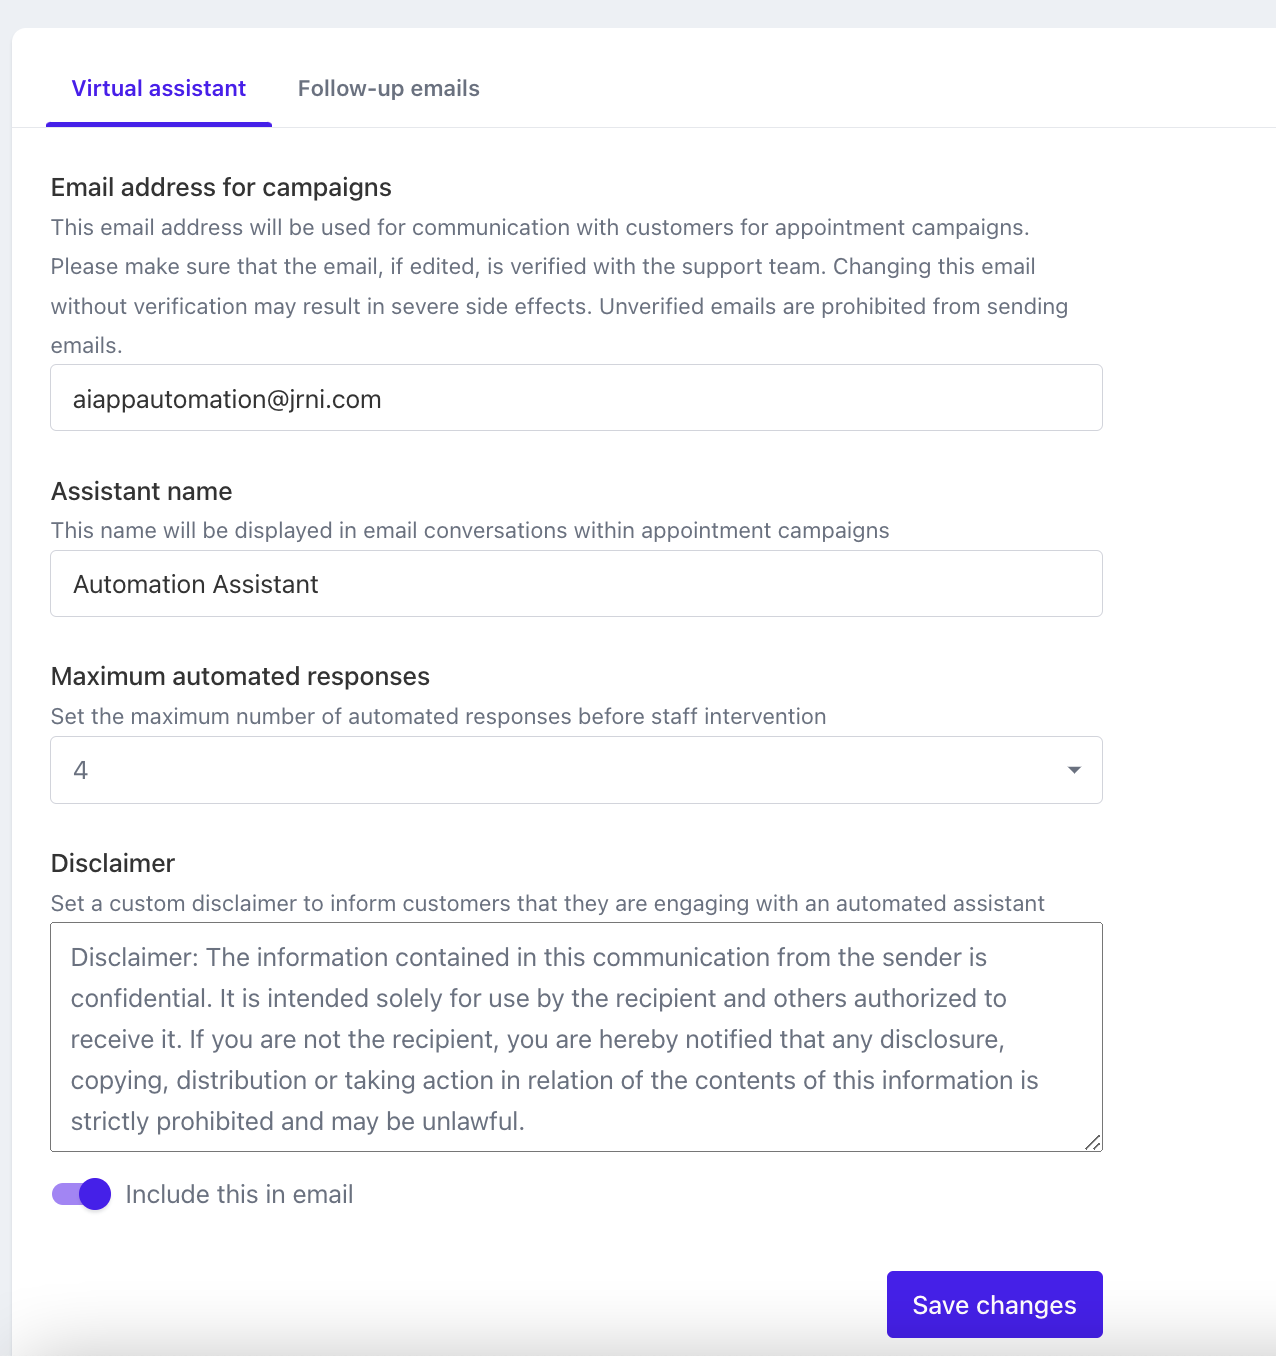
Under virtual assistant, you can select an e-mail address for communication, set a name etc.
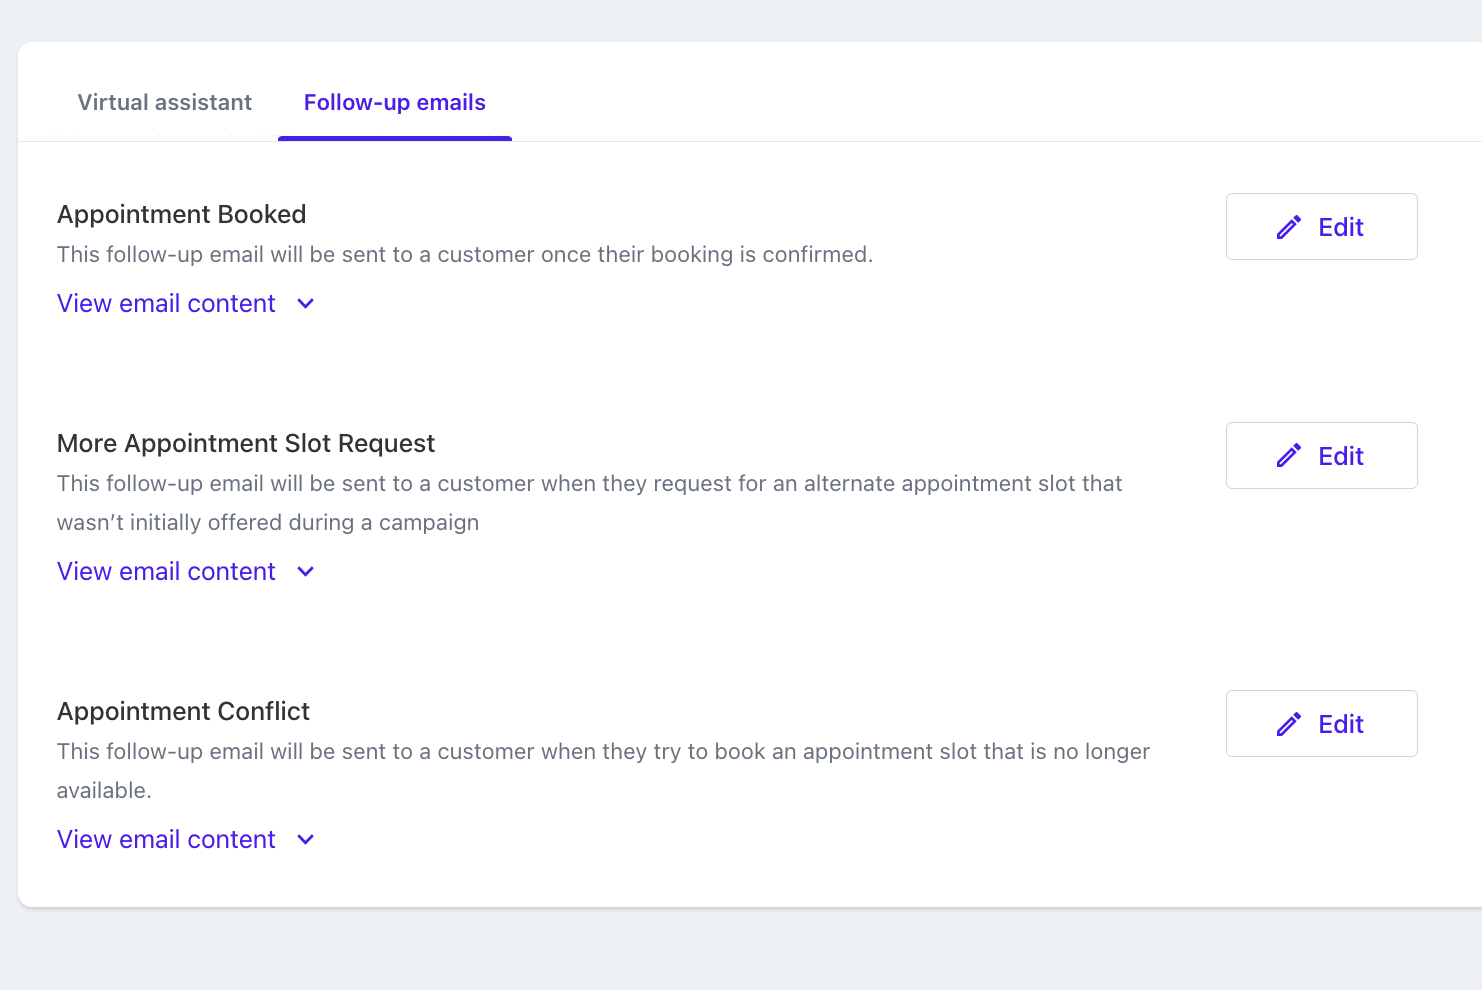
Under follow-up email, you can create e-mail types for different scenarios such as:
- More appointment slots request - This email will be triggered when a customer requests for an alternate appointment slot that wasn’t initially offered
- Appointment conflict - This email will be triggered when a customer tries to book an appointment that is no longer available
- Appointment booked - This email will be sent as confirmation mail when a customer successfully books an appointment slot
Still have questions?
If you have any further questions about the new customer booking journey, please contact JRNI Customer Support, who will be happy to help.